
A Guide to Yoga Handstands for Beginners
How to Do Yoga Handstands: A Guide for Beginners
The first time your yoga instructor invited you to try on a handstand, your initial reaction may have been no way. And for good reason. While many athletes and gymnasts make them look easy, handstands are a complicated skill that take time, practice, and patience to nail.
Today, we’re diving into how to do yoga handstands as both an inversion-beginner and a longtime arm balancer. If you’ve been struggling to figure out how to get upside down, this guide will help you understand how to get confident on your hands.
In this post we’ll cover:
Common handstand mistakes and how to fix them
The yoga handstand warm-ups you need to get upside-down
How to do yoga handstands
Handstand progressions
5 Muscle Groups You Need to Warm Up for Yoga Handstands
Handstands are known for being a pose that needs every major muscle group to be strong and active, but handstands actually require a combination of strength and flexibility. Before practicing handstands in yoga, you need to make sure your body is warmed up to avoid injury. The following exercises will help you find the balance between strength and flexibility to warm you up for handstands alongside a warming vinyasa flow. Read on for the 5 muscle groups you need to warm up for yoga handstands.
Forearms, Wrists, and Hands
Your wrists should not be in any pain during handstands, but they do take on pressure. If placing your hands flat on the ground feels uncomfortable, consider putting a towel under your palms or purchasing a set of angled yoga blocks.
Warm up your wrists with wrist stretches. Start in tabletop. Point your fingers back towards your knees and gently lean back until you feel a gentle stretch. Your wrists are sensitive, so stop before you feel a pull. The focus here is on increasing wrist mobility, so let it be about introducing your wrists to the movement - not about getting the deepest stretch, as wrists are prone to injury. Hold the stretch for three sets of 3-5 breaths.
2. Shoulders & Chest
Your shoulders need to be both strong and flexible to balance in your handstands. Shoulder flossing is a great way to increase mobility in the shoulder girdle to prepare for open shoulders in handstands.
Hold a strap, towel, or t-shirt between your hands, wider than shoulder-width. Keep your shoulder blades pulled down your back and your traps relaxed. Lift your arms up and back, keeping gentle tension on the strap. This should feel like a stretch, but should not be painful or feel deep. For less sensation, open your hands up wider. For more sensation, bring your hands slightly closer together. Thread overhead 10-15 times.
3. Abdominals
A handstand is essentials plank pose with your arms expenses overhead. Holding plank is a great way to build the muscle memory of an active core and a straight spine.
Place your hands directly under your shoulders and step your feel back to hips-width distance. Hug your belly button up and in while you press into your palms to activate your strong chest muscles. To feel the activation specifically in your core, traction your hands towards your feet and your feet towards your hands. Hold three sets of plank: 30 seconds, 45 seconds, and 1 minute.
4. Quadriceps
While the goal is to lift into a handstand with as little momentum as possible, having strong quads will help you kick up and find lift in your yoga handstands as a beginner.
Donkey kicks are a great way to build strength for kicking up into a handstand. You can do donkey kicks with one leg kicking up, or with both legs kicking up. Rest between sets of 5-10 to avoid shoulder burnout.
5. Hamstrings
The more flexible your handstands are, the easier it will be for you to progress in your handstand practice towards advanced yoga handstands like press-ups.
Stretch your hamstrings to prepare for handstands with standing splits. Start in a forward fold with your feet together at the front of your mat. Place your fingertips gently on the ground or on a block, and slowly lift one leg up and back behind you. Keep your hips square down to the ground, and pull your chest forwards to deepen the stretch. Hold for 10 breaths on one side, then switch legs.
Are you making these common handstand mistakes?
While many people practice yoga for handstands, few are able to practice handstands with proper alignment and activation. So before the next time you get upside down, make sure you’re not making these common yoga handstand mistakes.
Mistake #1: Skipping your warm-ups
There’s a reason why it’s the golden rule. Handstands are known for using every major muscle group in the body, and if you try to jump in before your body is properly warmed up, there’s a chance you could hurt yourself. The best time to do a handstand in yoga is after a warming vinyasa flow with handstand drills.
Mistake #2: Improper wrist-over-shoulder alignment
If your shoulders are too tight, you may need to work on flexibility before you can do a proper handstand safely. To check if you have the shoulder flexibility required to do a handstand, stand up straight with your back against a wall and reach your arms overhead. If you can reach your arms straight up so that your wrists stack over your shoulders, your shoulders are open enough to hold proper alignment. The stacking should be easy and not feel like a stretch.
Mistake #3: Arching your back
This is perhaps the biggest mistake beginner handstanders make. Keeping your spine straight is important not only for safe alignment, but for proper muscle activation. If your spine is arched during your handstand, there are a few different reasons why this may be happening.
Your shoulders are too tight.
Arching your back overcompensates for shoulders that are not able to open and reach directly overhead. If this is the case, improve your handstand alignment by focusing on safely stretching your latissimus dorsi, teres major, and pecs.
Your core isn’t activated.
Letting your ribs splay out is often a sign that your core is not activated to neutralize your spine. Before you find lift off, hug your belly button in and activate your pelvic floor muscles. Always warm up with core exercises that strengthen not only your rectus abdominals muscles, but your transverse abdominals, erector spinae, and pelvic floor.
Your gaze is too far forward.
To find balance, it’s helpful to start practicing handstands with your gaze on the ground. Look between your pointer fingers or slightly past them. If you’re looking too far forward, your chest may follow and cause you to have an arched back. Attempt to keep your neck relaxed and gaze with your eyes, not your whole body.
4. You’re scared of falling over
Mentally, it takes practice and patience to get confident upside-down. If you’re scared of falling, it will show in your form, often with an arched back as your legs kick up but your belly wants to stay close to the ground. Practicing near a wall or with a partner to “catch” your feet can help you feel more comfortable.

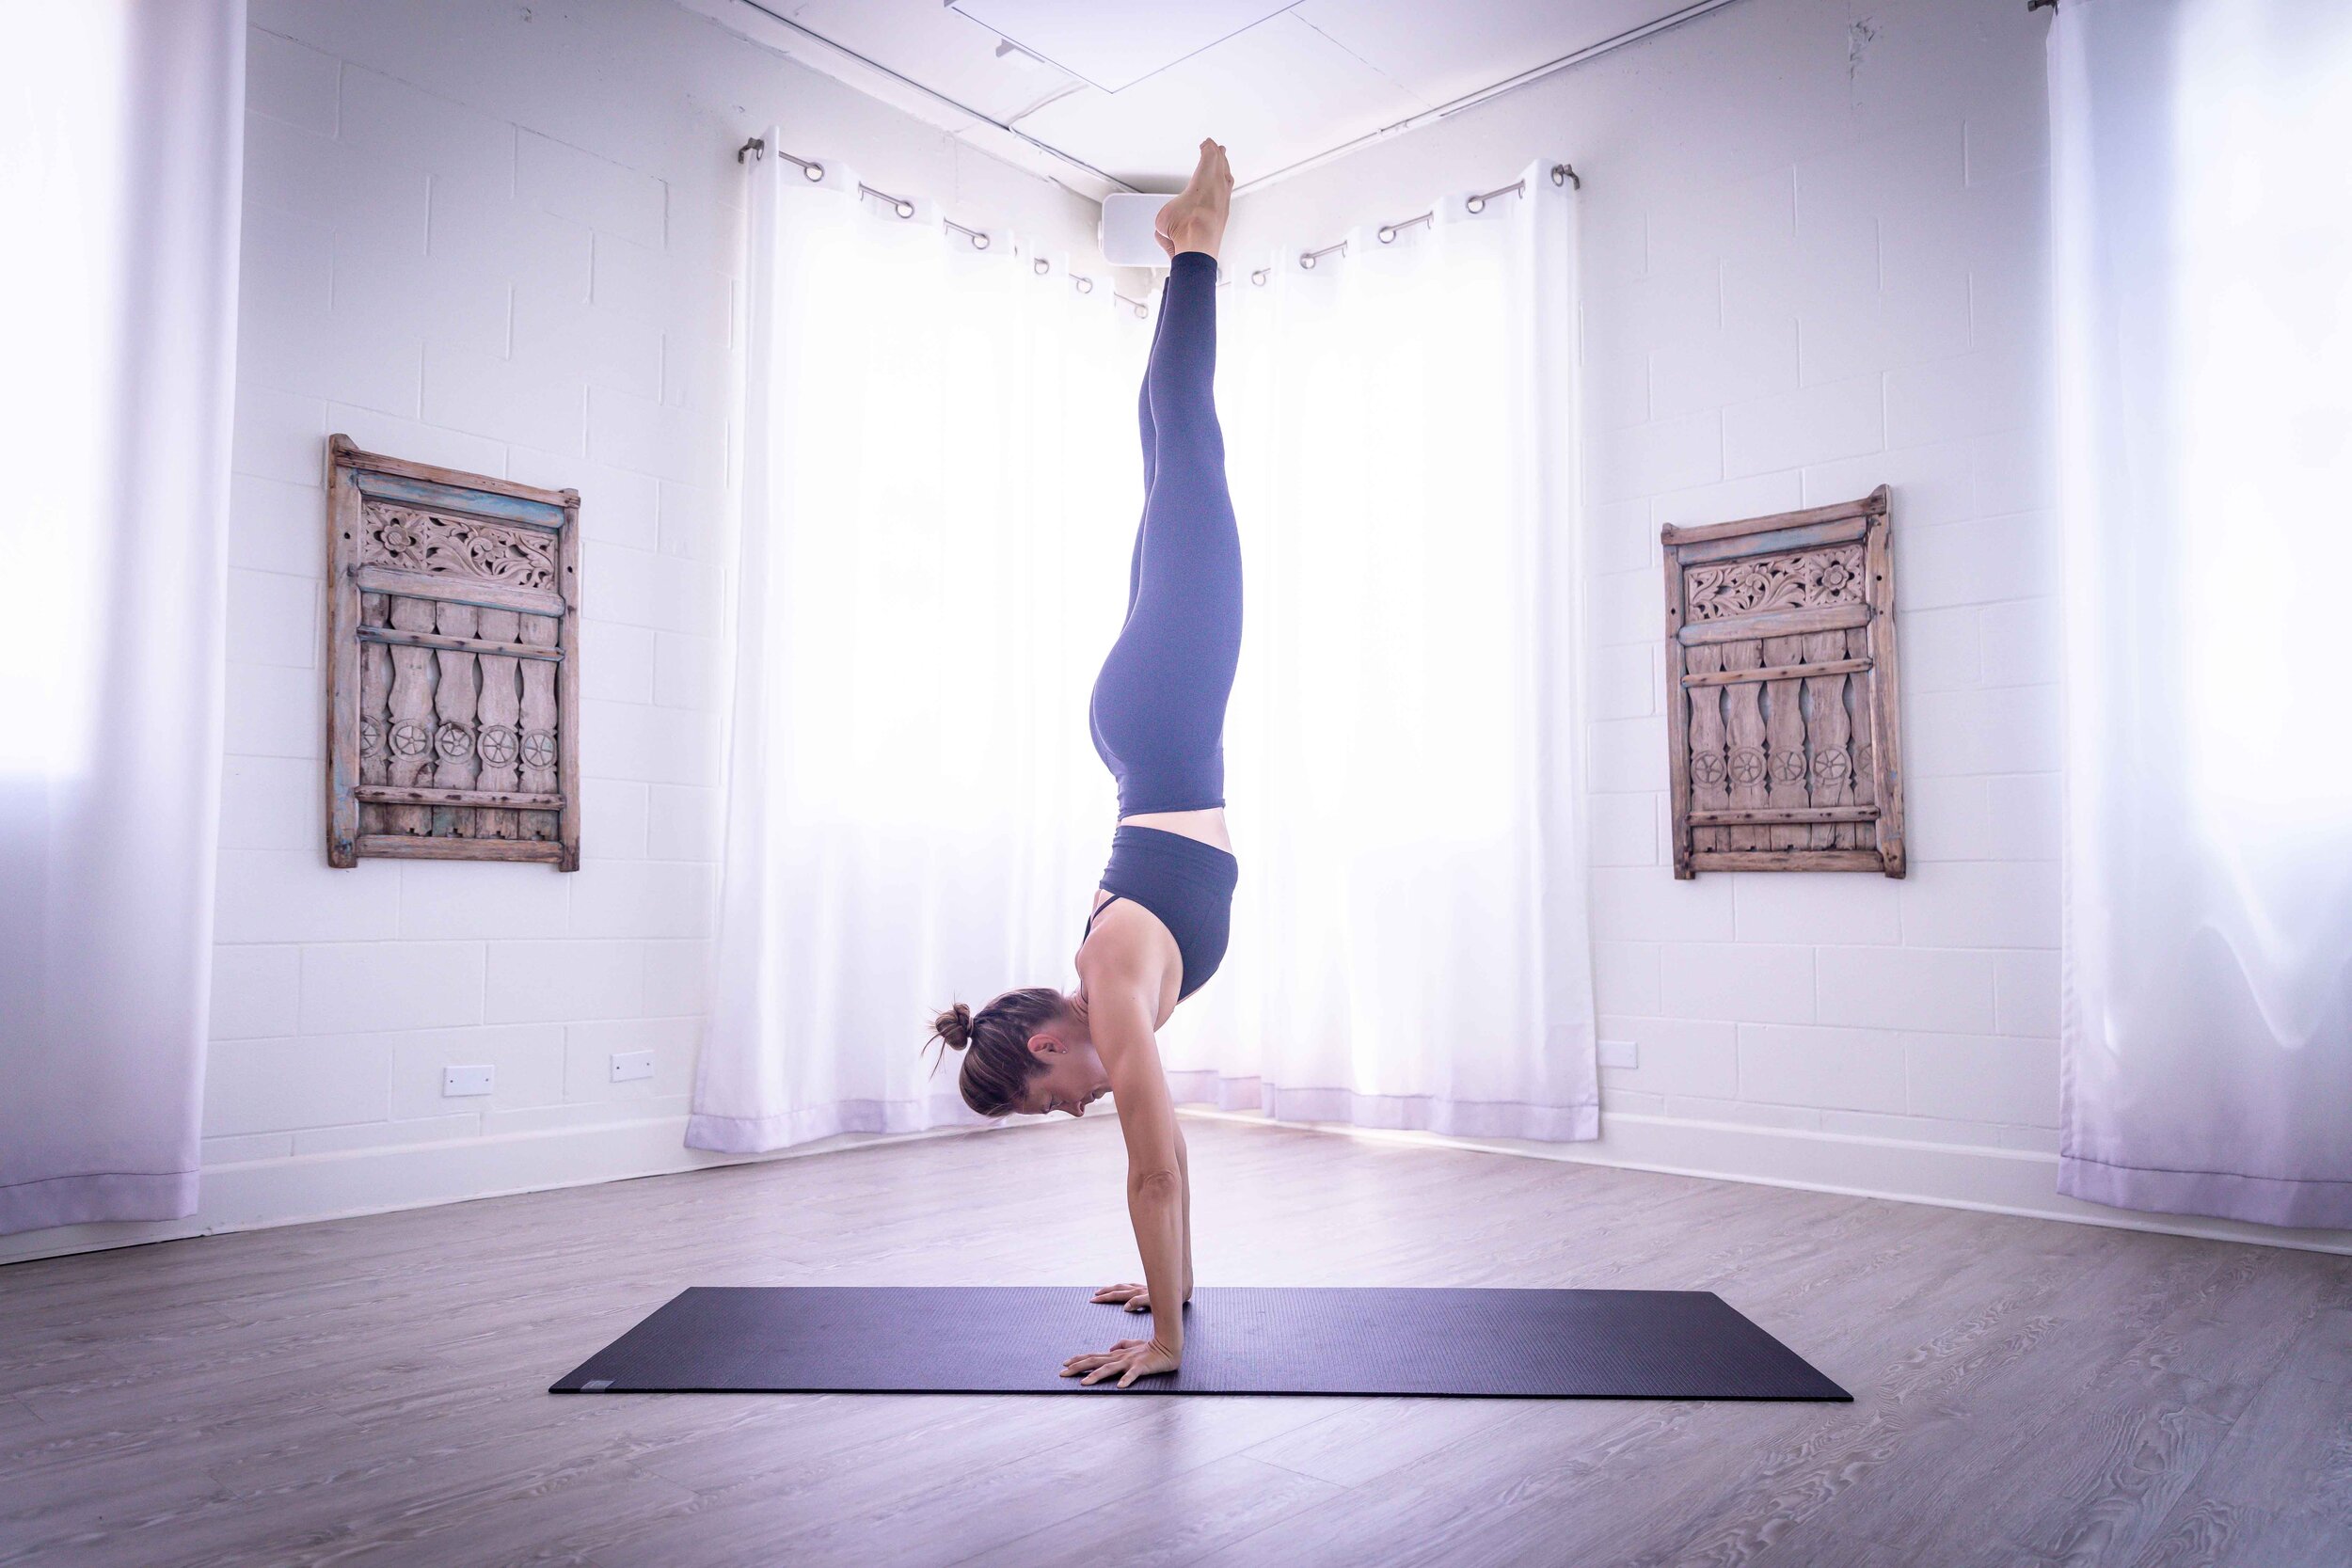
How To Do Yoga Handstands Step-By-Step
Start in Downward Facing Dog. Set your yoga mat on the floor about one foot away from the wall. Set your hands on the mat shoulder-width distance apart, leaving a little space at the top of your mat. Spread your fingers wide and grip the mat with your finger pads.
Walk your feet forward. Lift onto your toes and start to walk your feet forward as close to your grounded palms as you can get them. Attempt to stack your hips over your shoulders, or at least have the feeling as though your weight is falling mostly into your hands.
Press your hands down into the ground to activate your shoulders and stabilizing muscles. Your arms should be straight and stacked, with your shoulders over your wrists. Grip the earth with all ten fingers to equally distribute your weight through your palms and take pressure off your wrists.
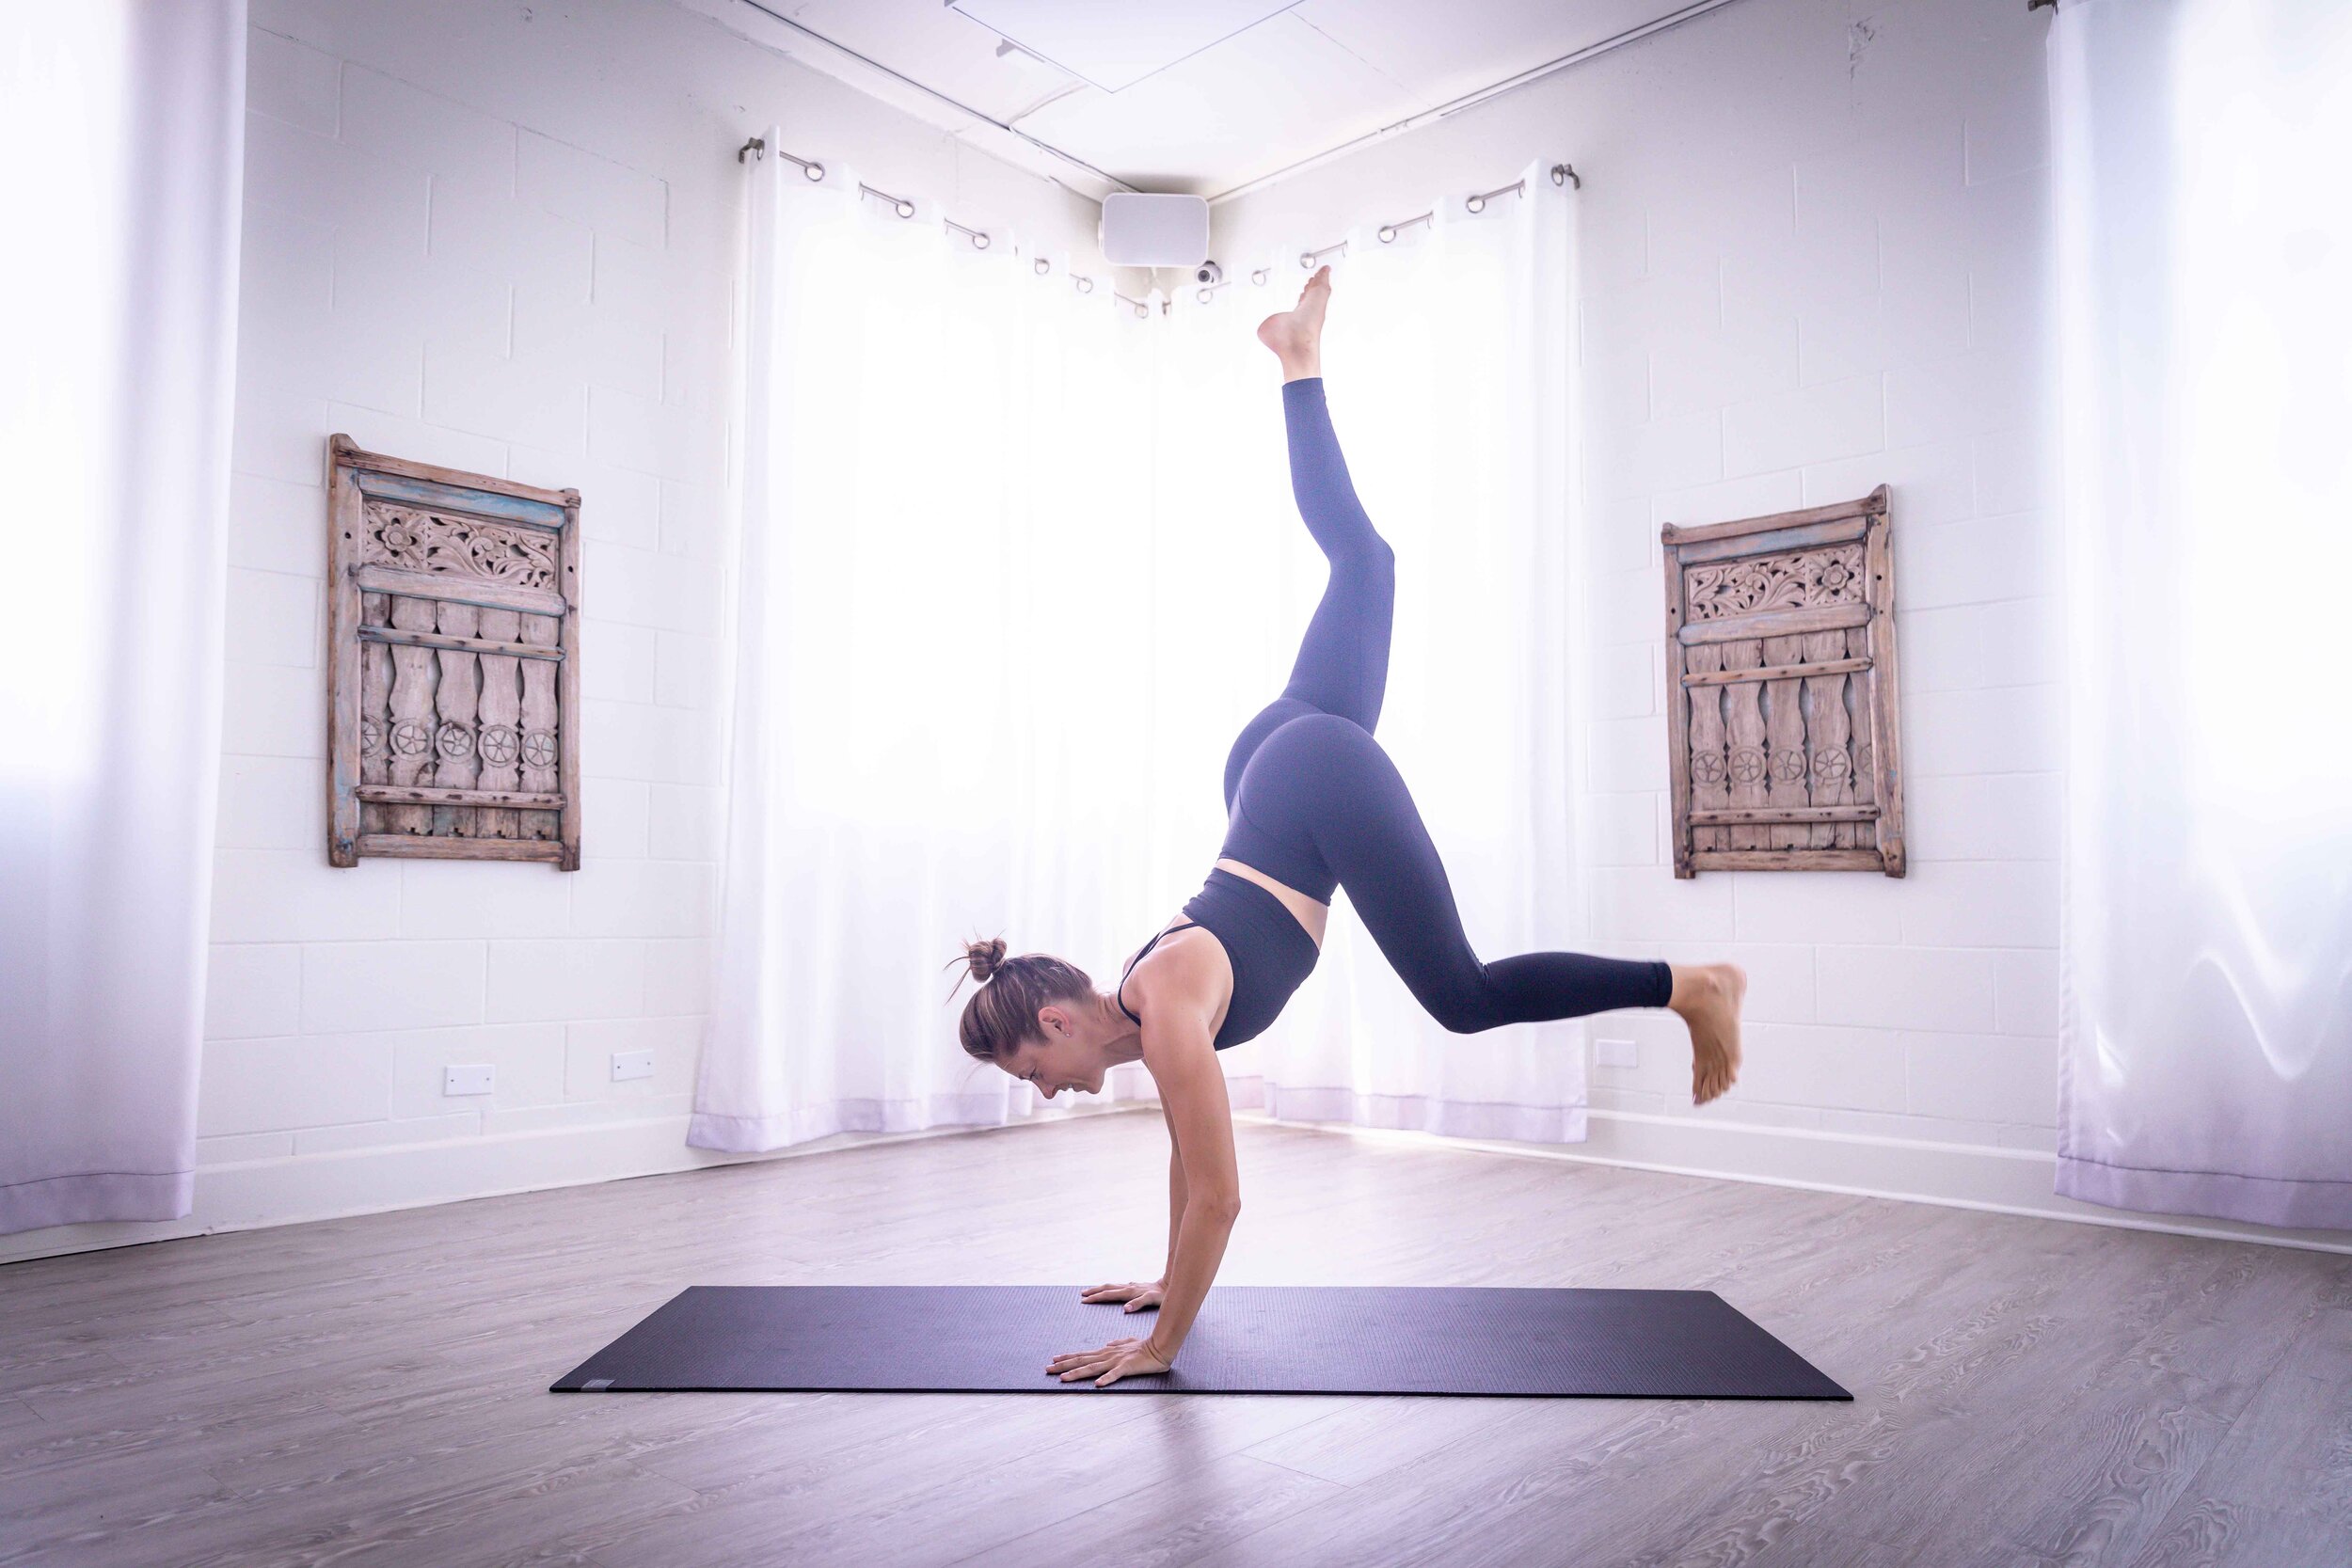
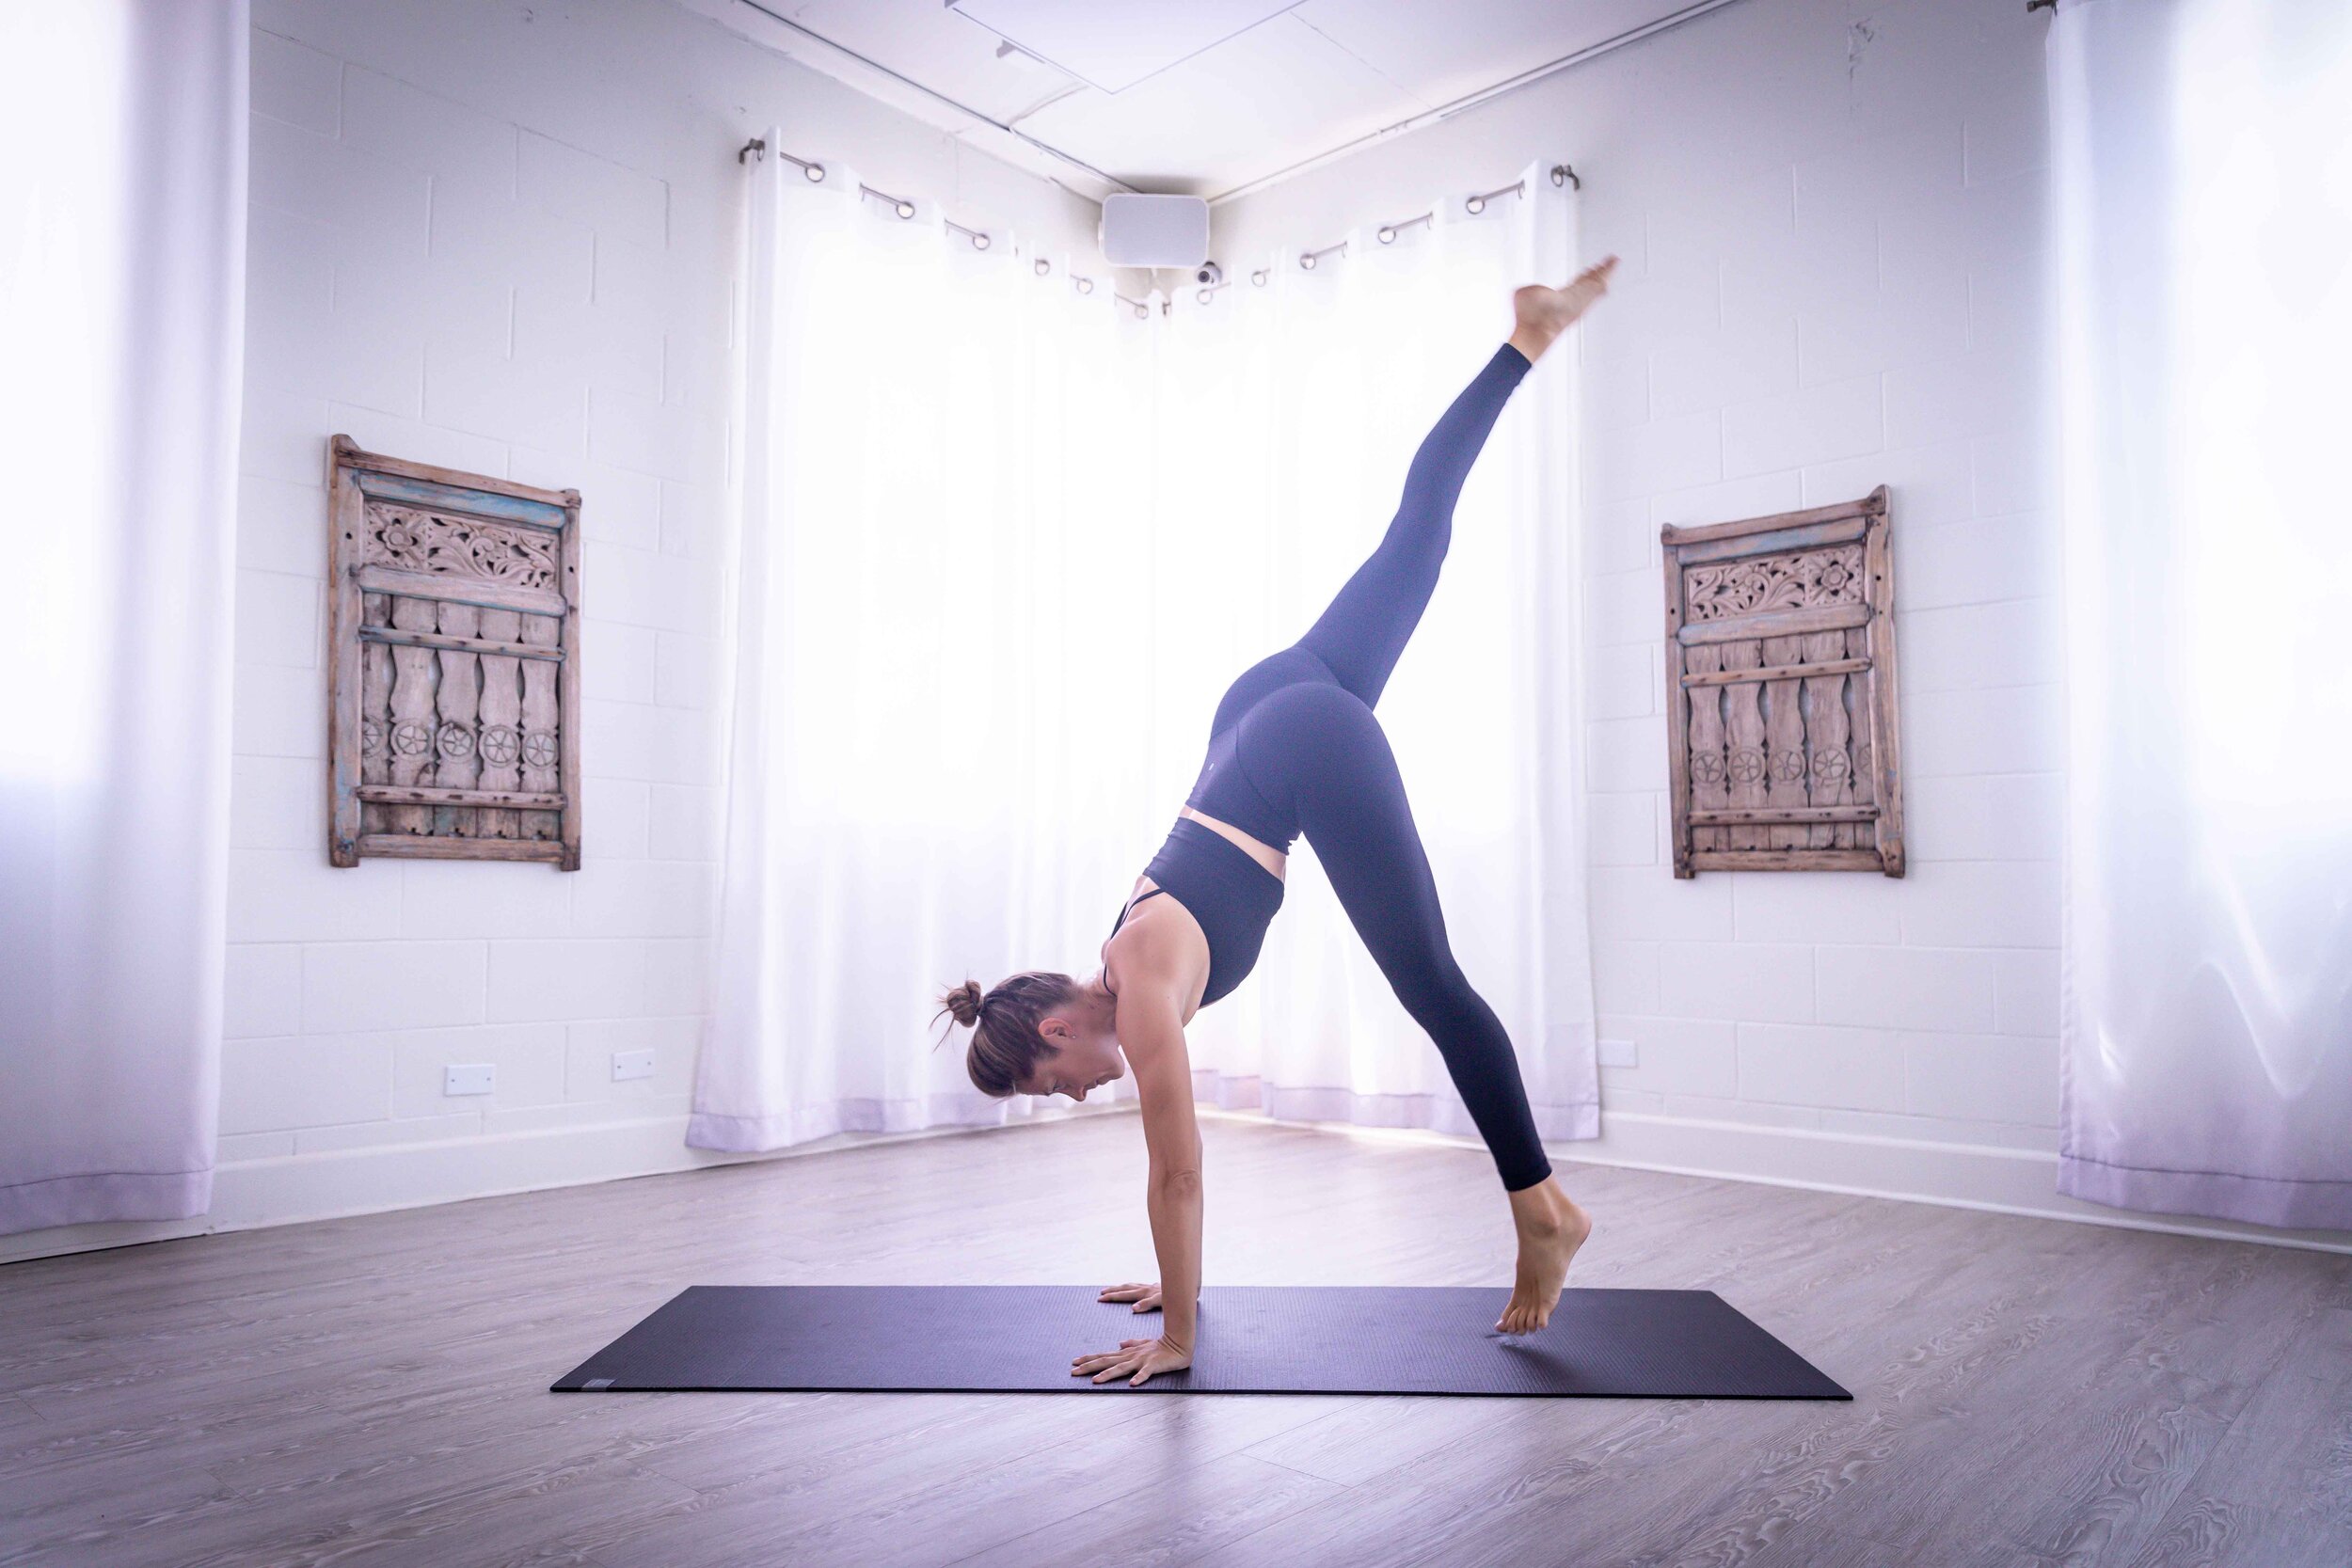
Lift one leg up. Activate your glute and hamstring to lift one leg up behind you. Keep your chest pulled forward to maintain length in your spine. Gaze down toward your fingertips or slightly past them.
Gently bend your bottom knee. Keeping your upper body exactly as it is, use your bottom leg to kick up towards the sky. Keep your top leg straight up. Imagine you’re shifting your hips further over your shoulders rather than your feet.
Squeeze your inner thighs towards one another to hug everything towards your midline. It can be easier to find balance with your legs slightly apart, but squeezing your inner thighs will ensure that your leg muscles are active. It can also help your body remember to activate your core.
Yoga Handstand Progression for Beginners
If you read the instructions and think “What if I’m not ready to be kicking up into a handstand yet?” there are a few ways you can work into yoga handstands with assistance. The key here is to take your time at each level. You may practice assisted pikes only for a few weeks until they feel comfortable to you before leveling up. Where you are is exactly where you need to be!
Below are some ways you can personalize your yoga handstand progression based on where you are in your arm balance journey.
Level 1: Assisted Pike
You need: A mat, a chair, and option for a towel under your palms
With your hands on the earth at shoulder-width distance, walk your feet up a wall or onto a chair at 90 degrees. Work to stack your hips directly over your shoulders. Hold for 10 breaths or until you feel the muscles in your arms start to burn. Slowly walk your feet back down the wall.
Level 2: Kick onto the Wall
You need: a mat, an open wall
Start with your hands about 1.5-2 feet away from the wall while in downward facing dog on your yoga mat. Kick up into your handstand, but allow your feet to rest on the wall. Focus on keeping your head and upper body stacked. Slowly lift your feet away from the wall, one foot at a time.
Level 3: Assisted Handstands
You need: A friend!
Invite a friend to help you move away from the wall with some assistance. Rather than practicing near a wall, kick up into the air while a friend holds their arm as a “stopper” to help you find center. Have your friend put a fist between your calves, and squeeze their fist with your legs.
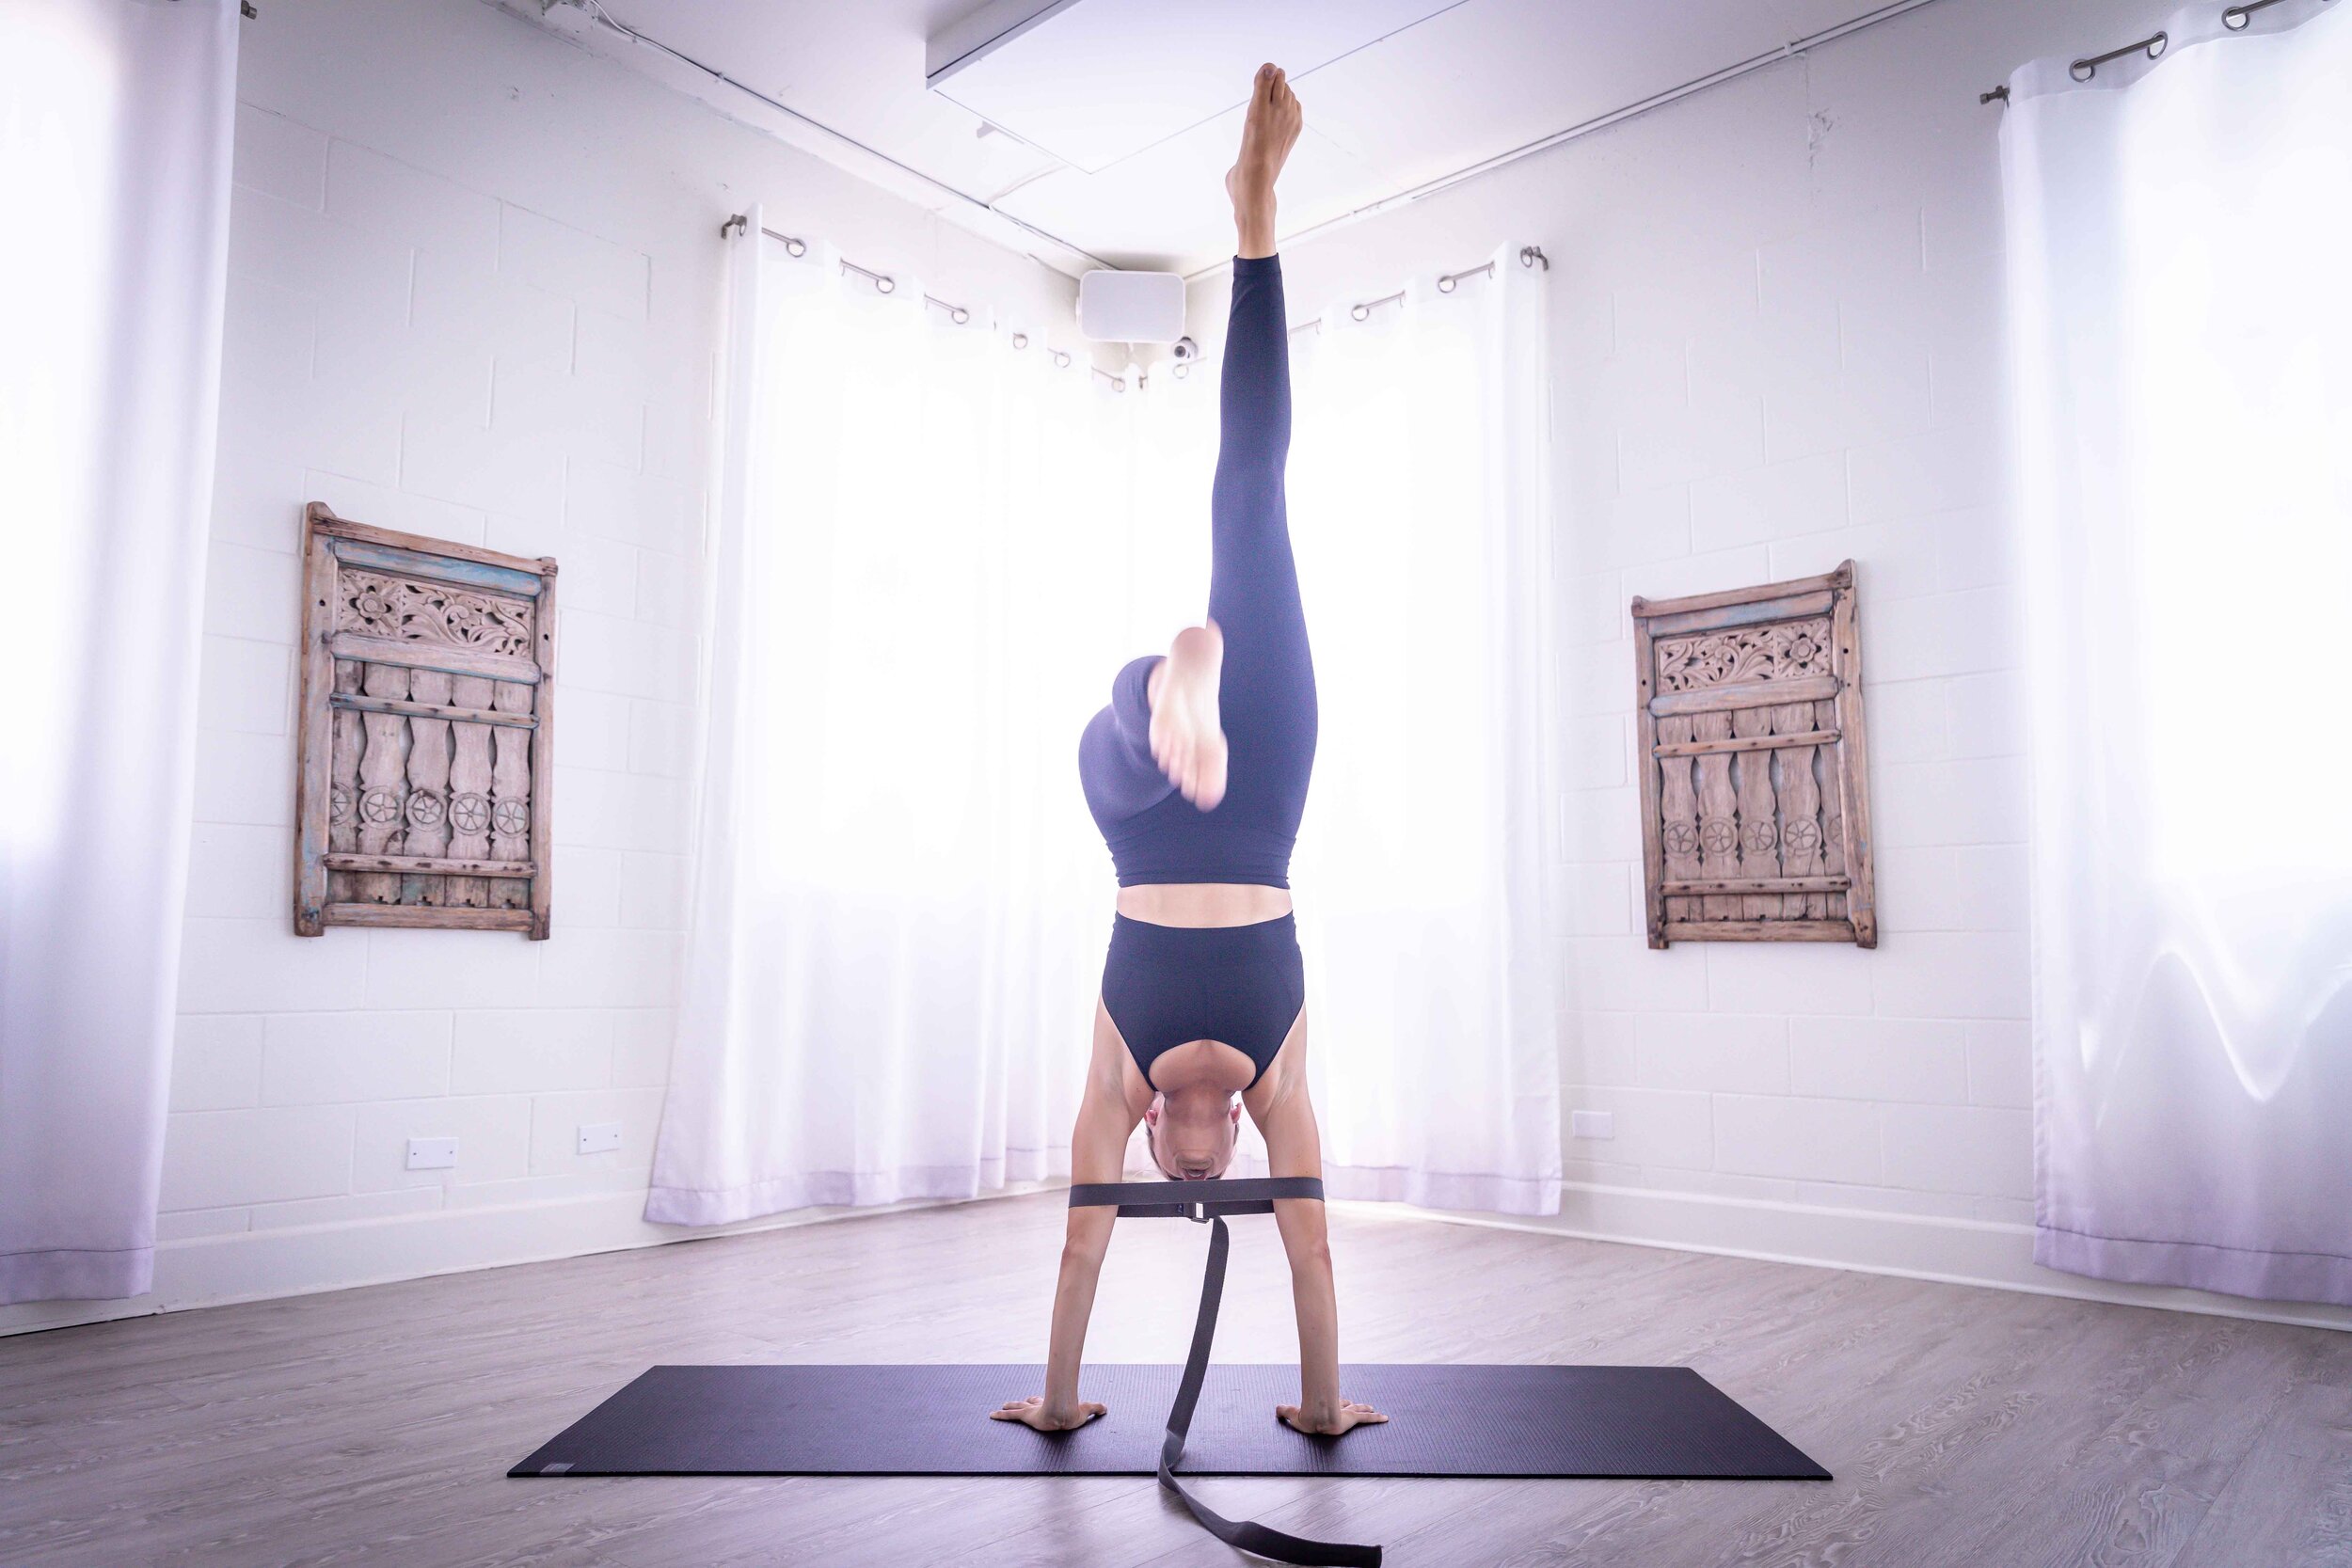
Level 4: Handstand with Strap
You need: An adjustable yoga strap
Loop your strap so that it fits around your upper arms, above your elbows, to hold your arms shoulder-width distance apart. The strap should be taut enough to hold your arms in place and keep your elbows from splaying out. Practice your handstand with the strap around your upper arms to help keep proper alignment in your upper body.
Remember that the goal of handstands is to get out of your comfort zone. There are so many benefits to getting upside down, so while you’re building strength and focusing on your form, remember to have fun! Sometimes getting out of your head is the best way to get through a hurdle.
What part of handstands is the most difficult for you? What arm balance do you want us to break down next? Let us know in the comments below!