
9 Beginner Yoga Poses to Relieve Lower Back Pain (With Pictures)

Are you struggling with lower back pain? You’re not alone.
If you sit for long periods during the day like most adults today, it’s natural for your upper leg and hip muscles to tighten and pull on your back muscles, causing low back aches and pains. Combine long periods of sitting with less-than-perfect posture, and you’ve got a recipe for a tight, sore, and unhappy lower back.
Yoga is a natural and effective way to improve your spine health from top to bottom. Today, we’ve put together a list of 9 beginner yoga poses to help relieve your lower back pain. In just 10 to 15 minutes of light stretching a day, you can relax, sooth, and soften your muscles to experience less chronic pain in your lower back.
Why Does Yoga Relieve Lower Back Pain?
Studies repeatedly show that practicing yoga can help relieve lower back pain as well as conventional therapeutic exercises and prescribed physical therapy treatment. If you stretch regularly before and/or after your workouts and are still experiencing chronic lower back pain, you may be wondering...what does yoga have that stretching doesn’t have?
Practicing yoga is beneficial to your spine for a wide variety of reasons, but it’s likely that yoga poses relieve lower back pain so effectively for three main reasons:
1. Yoga is focused on proper alignment
This is not about getting a deep stretch. Yoga invites you to focus on your foundational alignment, first and foremost. When you align your bones and joints correctly, you are often able to experience a more effective, active stretch.
2. Yoga invites greater body awareness
While stretching is often an add-on at the end of a routine, practicing yoga invites you to take the time to notice how it feels to move your body in a variety of ways. This often leads to greater body awareness not just on your mat, but as you move through life. Yoga can help correct posture, relieve tension, and align the body as you move through life.
3. Yoga routines tend to be more balanced than most stretching routines
When we practice yoga, we are aiming to return to the source. Oftentimes, the source of your pain may be somewhere unexpected in your body, and the pain you’re feeling in your lower back is just a symptom of another issue. Tight or weak IT bands, hips, psoas muscles, paraspinals, and abdominal muscles can all cause your lower back to overcompensate and become sore.
Why Do I Have Chronic Lower Back Pain?
There are so many reasons why people have lower back pain. Below, we’ll discuss whether you should practice yoga if you are dealing with some of the main causes of lower back pain.
1. You have a torn or injured muscle or ligament
If you suspect that activity, movement, or heavy lifting is the cause of your lower back pain, you likely have an injured muscle or ligament. Low back sprains can come on suddenly or slowly over time due to repeated movement, but they are the most common cause of lower back pain. While painful, these injuries will heal on their own over time, and gentle yoga can help strengthen supportive muscles during the healing process.
2. You have a disc or joint problem or an irritated nerve
If you think your low back issue may be caused by a disc, joint, or compressed nerve issue, avoid practicing yoga poses until you have seen a doctor. In some cases, forward folds, gentle backbends, and hamstring stretches can make your symptoms worse.
3. Your body is out of balance
If you spend all day sitting at a desk for work, it’s likely that your back pain is caused by poor posture, pressure on your lower back discs, and lack of movement. Sitting upright puts the most pressure on your back, so taking breaks throughout the day to stand and walk around will help relieve pressure. Even a short, 15-minute yoga routine can help you add movement into your day to realign and invite balance back into the body.
Introducing: 9 Yoga Poses for Lower Back Pain
The 9 beginner yoga poses we’ll be breaking down in this post are as follows?
Downward Facing Dog
Standing Forward Fold
Cat/Cow Pose
Plank Pose
Extended Puppy Pose
Child’s Pose
Spinal Twist
Pigeon Pose
Happy Baby
A tip from your teachers: Rather than overstretching, let your body slowly relax into the following poses. If you push yourself to your limit, you could end up injuring another part of your body, or hurting your back more. Remind yourself to breathe, relax, and honor your body exactly as it is now. Gravity can do most of the work here.
Downward Facing Dog (Adho Mukha Svanasana)
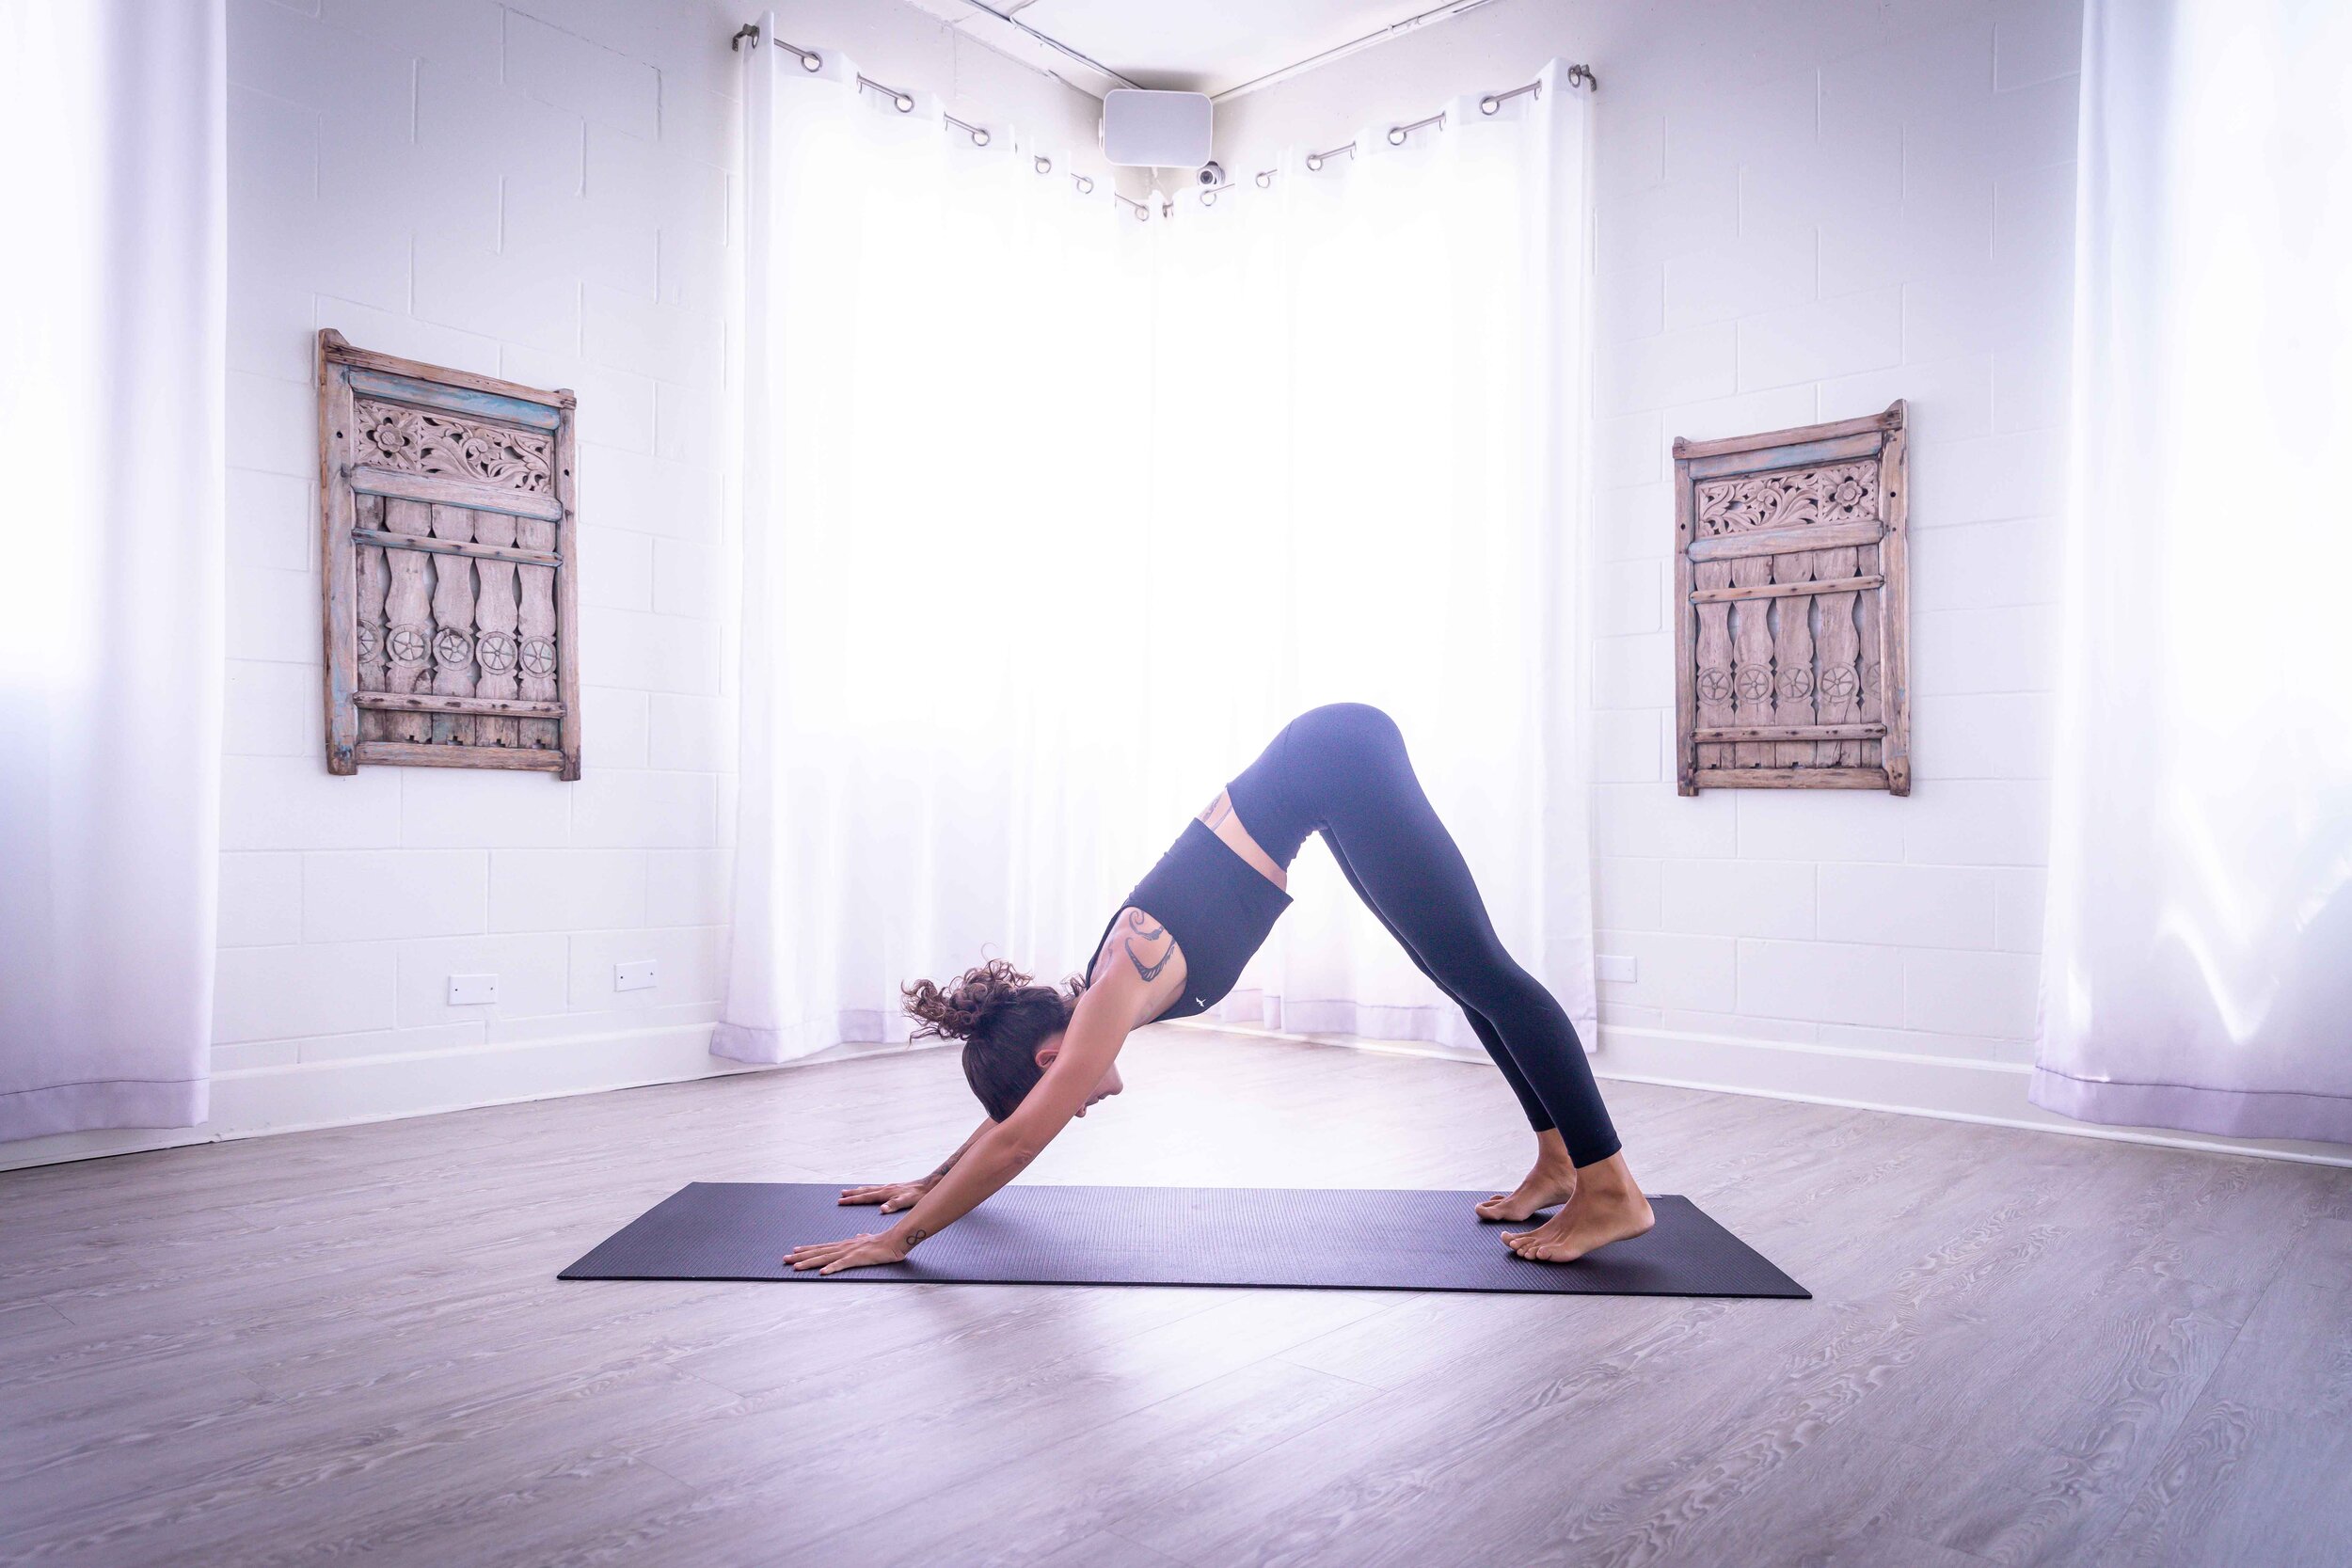
Even if you’ve never practiced yoga before, you probably recognize this pose — and for good reason. It’s a full-body stretch beneficial for the entire body, including the lower back.
How to move into Downward Facing Dog:
Start in a tabletop position, then walk your hands three or four inches forward. Press into your hands and lift your hips up and back. Gently press your heels to the floor, and keep your knees slightly bent. Hold for 5 to 10 full rounds of breath. As you exhale, lift your tailbone up higher.
Tips for practicing Downward Facing Dog:
Press down firmly into each palm, particularly into your thumb and forefinger.
Spin your shoulder blades out and up to avoid sinking into your shoulders.
Let your head hang freely to remove any tension in your neck.
If your lower back feels rounded, bend your knees deeper.
Focus on lifting your hips up and back rather than on pressing your heels down — it’s completely natural if your heels don’t touch the floor.
Standing Forward Fold (Uttanasana)

If you’re sitting at a desk or on your couch for long periods of the day, make it a habit to take a break every 30 minutes or so and relax into this pose. You’ll feel refreshed, and your lower back will thank you.
How to move into Standing Forward Fold:
Start in a standing position with your feet hips-width distance apart. Inhale, then exhale and bend at your hips. Keep your back straight and pull your hips back as you fold, then, relax your upper body toward the floor. Hold onto opposite elbows and relax your neck. Keep your knees soft or slightly bent. Hold for 5 to 10 full rounds of breath.
Tips for practicing Standing Forward Fold:
As you inhale, lift your tailbone up. As you exhale, relax your upper body to the floor.
If your torso is lifted or your back feels rounded, bend your knees more deeply to let your belly hang on your thighs
When you’re ready to stand, lift up slowly one vertebrae at a time
Cat Pose (Marjaryasana) / Cow Pose (Bitilasana)

Okay, it’s true — this isn’t one pose, it’s two. But the combination of flexion and extension is dreamy for your spine. Moving between Cat and Cow is great for spinal mobility so that you’re left feeling balanced, but it’s also great for finding your spine’s neutral position. This will help improve your posture — an extra plus for supporting your lower back.
How to move into Cat/Cow :
Start in a tabletop position with your shoulders over your wrists and your hips over your knees.
Move into Cat:
Inhale, then exhale and lift your spine to the ceiling. Round your shoulder blades out. Hug your belly in. Relax your head to feel the stretch through your upper spine as well. Hold for 3 full rounds of breath.
Move into Cow:
Inhale and lift your chest up. Lift your tailbone up. Squeeze your shoulder blades together. Gaze forward or slightly to the ceiling. Hold for 3 full rounds of breath.
Flow through Cat/Cow:
Inhale to Cow, exhale to Cat. Repeat 5 to 10 times.
Tips for best practice of cat/cow pose:
Let your breath lead the movement, rather than your movement lead the breath.
Move slowly.
Keep an equal balance between your hand and knees.
Plank Pose (Dandasana)
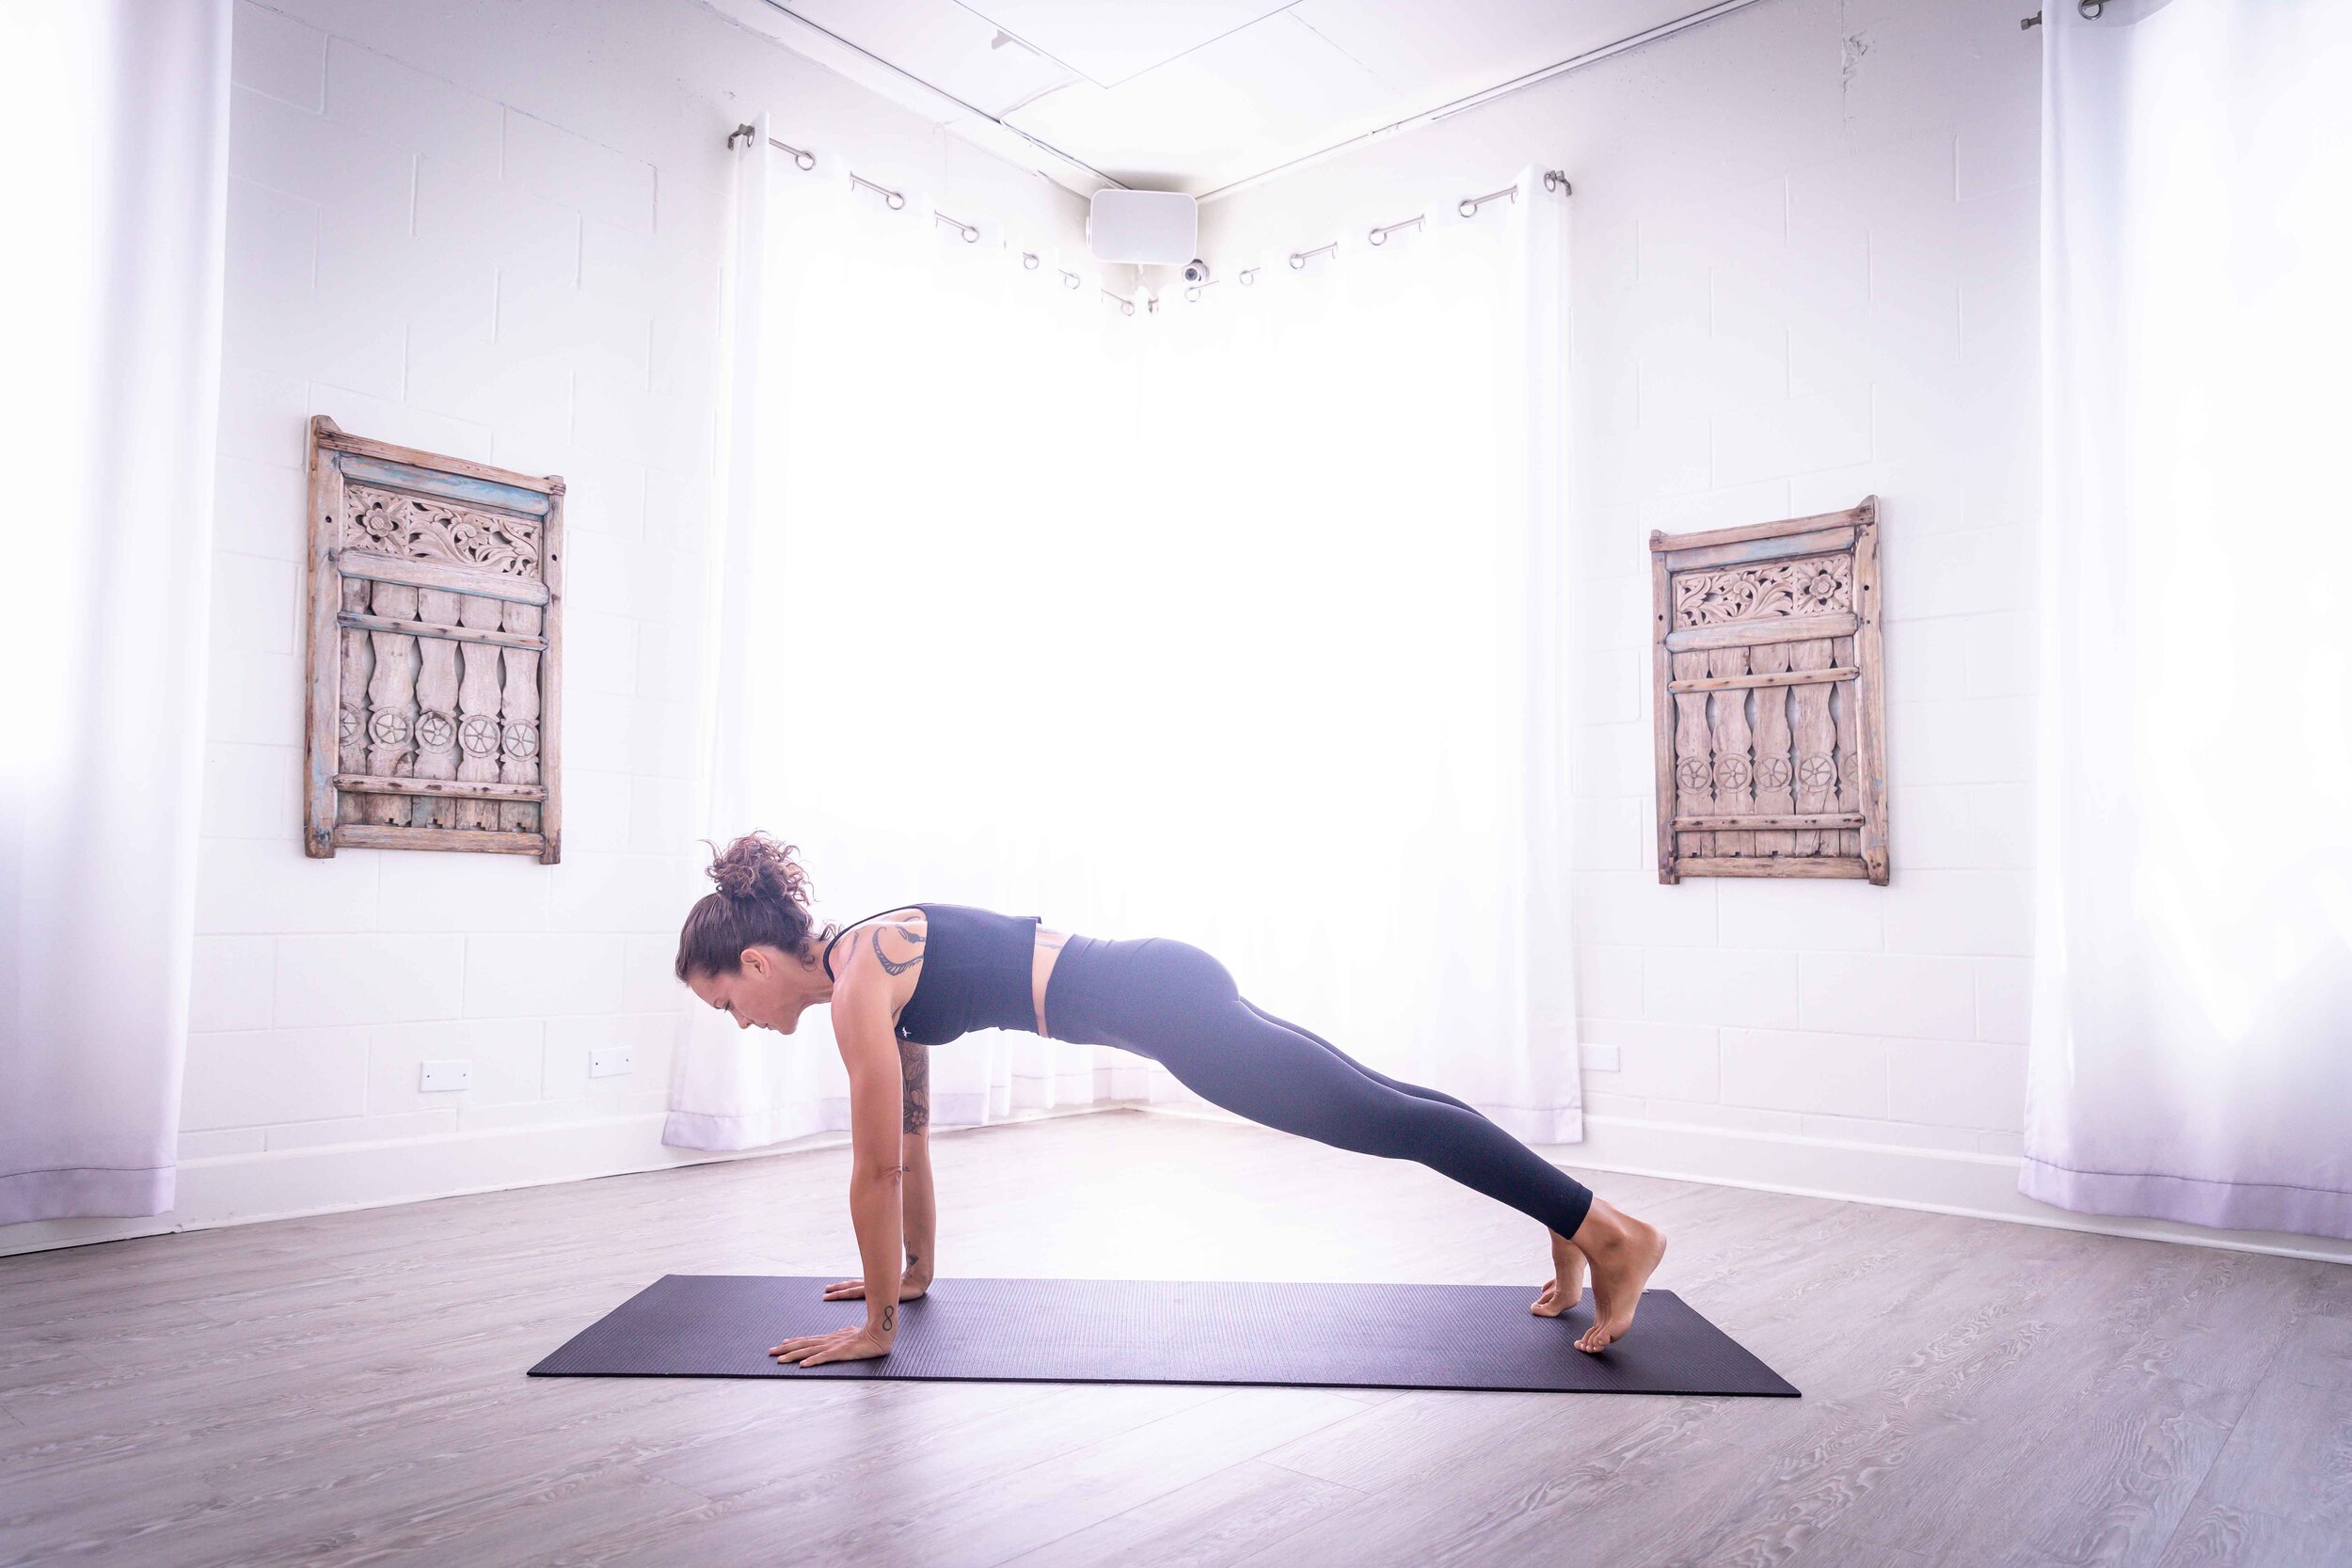
Your lower back is deeply connected to your core. If you’re feeling pain in your lower spine, it could be due to an imbalance in your body — your spine may be taking on some of the work of your core. Strengthening your core is one of the best ways to take this pressure off your lower back and protect your lower spine from future injury. Hold for 5-10 full rounds of breath.
How to move into Plank Pose:
Start in a tabletop position, then step your feet back so your body is parallel to the floor. Hug your belly up and in. Gaze down or slightly forward to keep length in the back of your neck.
Tips for practicing High Plank Pose:
If you feel your booty lifting, pull your pelvis slightly forward.
Round out your shoulder blades to avoid collapsing into your shoulders.
Press your heels slightly back to feel more engagement in your core.
Extended Puppy Pose (Uttana Shishosana)

This deeply relaxing pose is one of the best spine lengtheners we know. A great tip for beginners: protect your lower back here by placing a yoga block between your thighs and calves. You could also use a rolled-up blanket. Remember to come out slowly.
How to move into Extended Puppy Pose:
Start in a tabletop position, then walk your hands forward a few inches. Inhale, then exhale and lift your hips up and back to stack over your knees. Keep your arms active. Relax your neck and rest your forehead on the floor, a blanket, or a yoga block. Hold for 5 to 10 full rounds of breath.
Tips for practicing Extended Puppy Pose:
Press your hands into the ground and pull your hips back evenly to lengthen and stretch your spine in both directions.
Child’s Pose (Balasana)
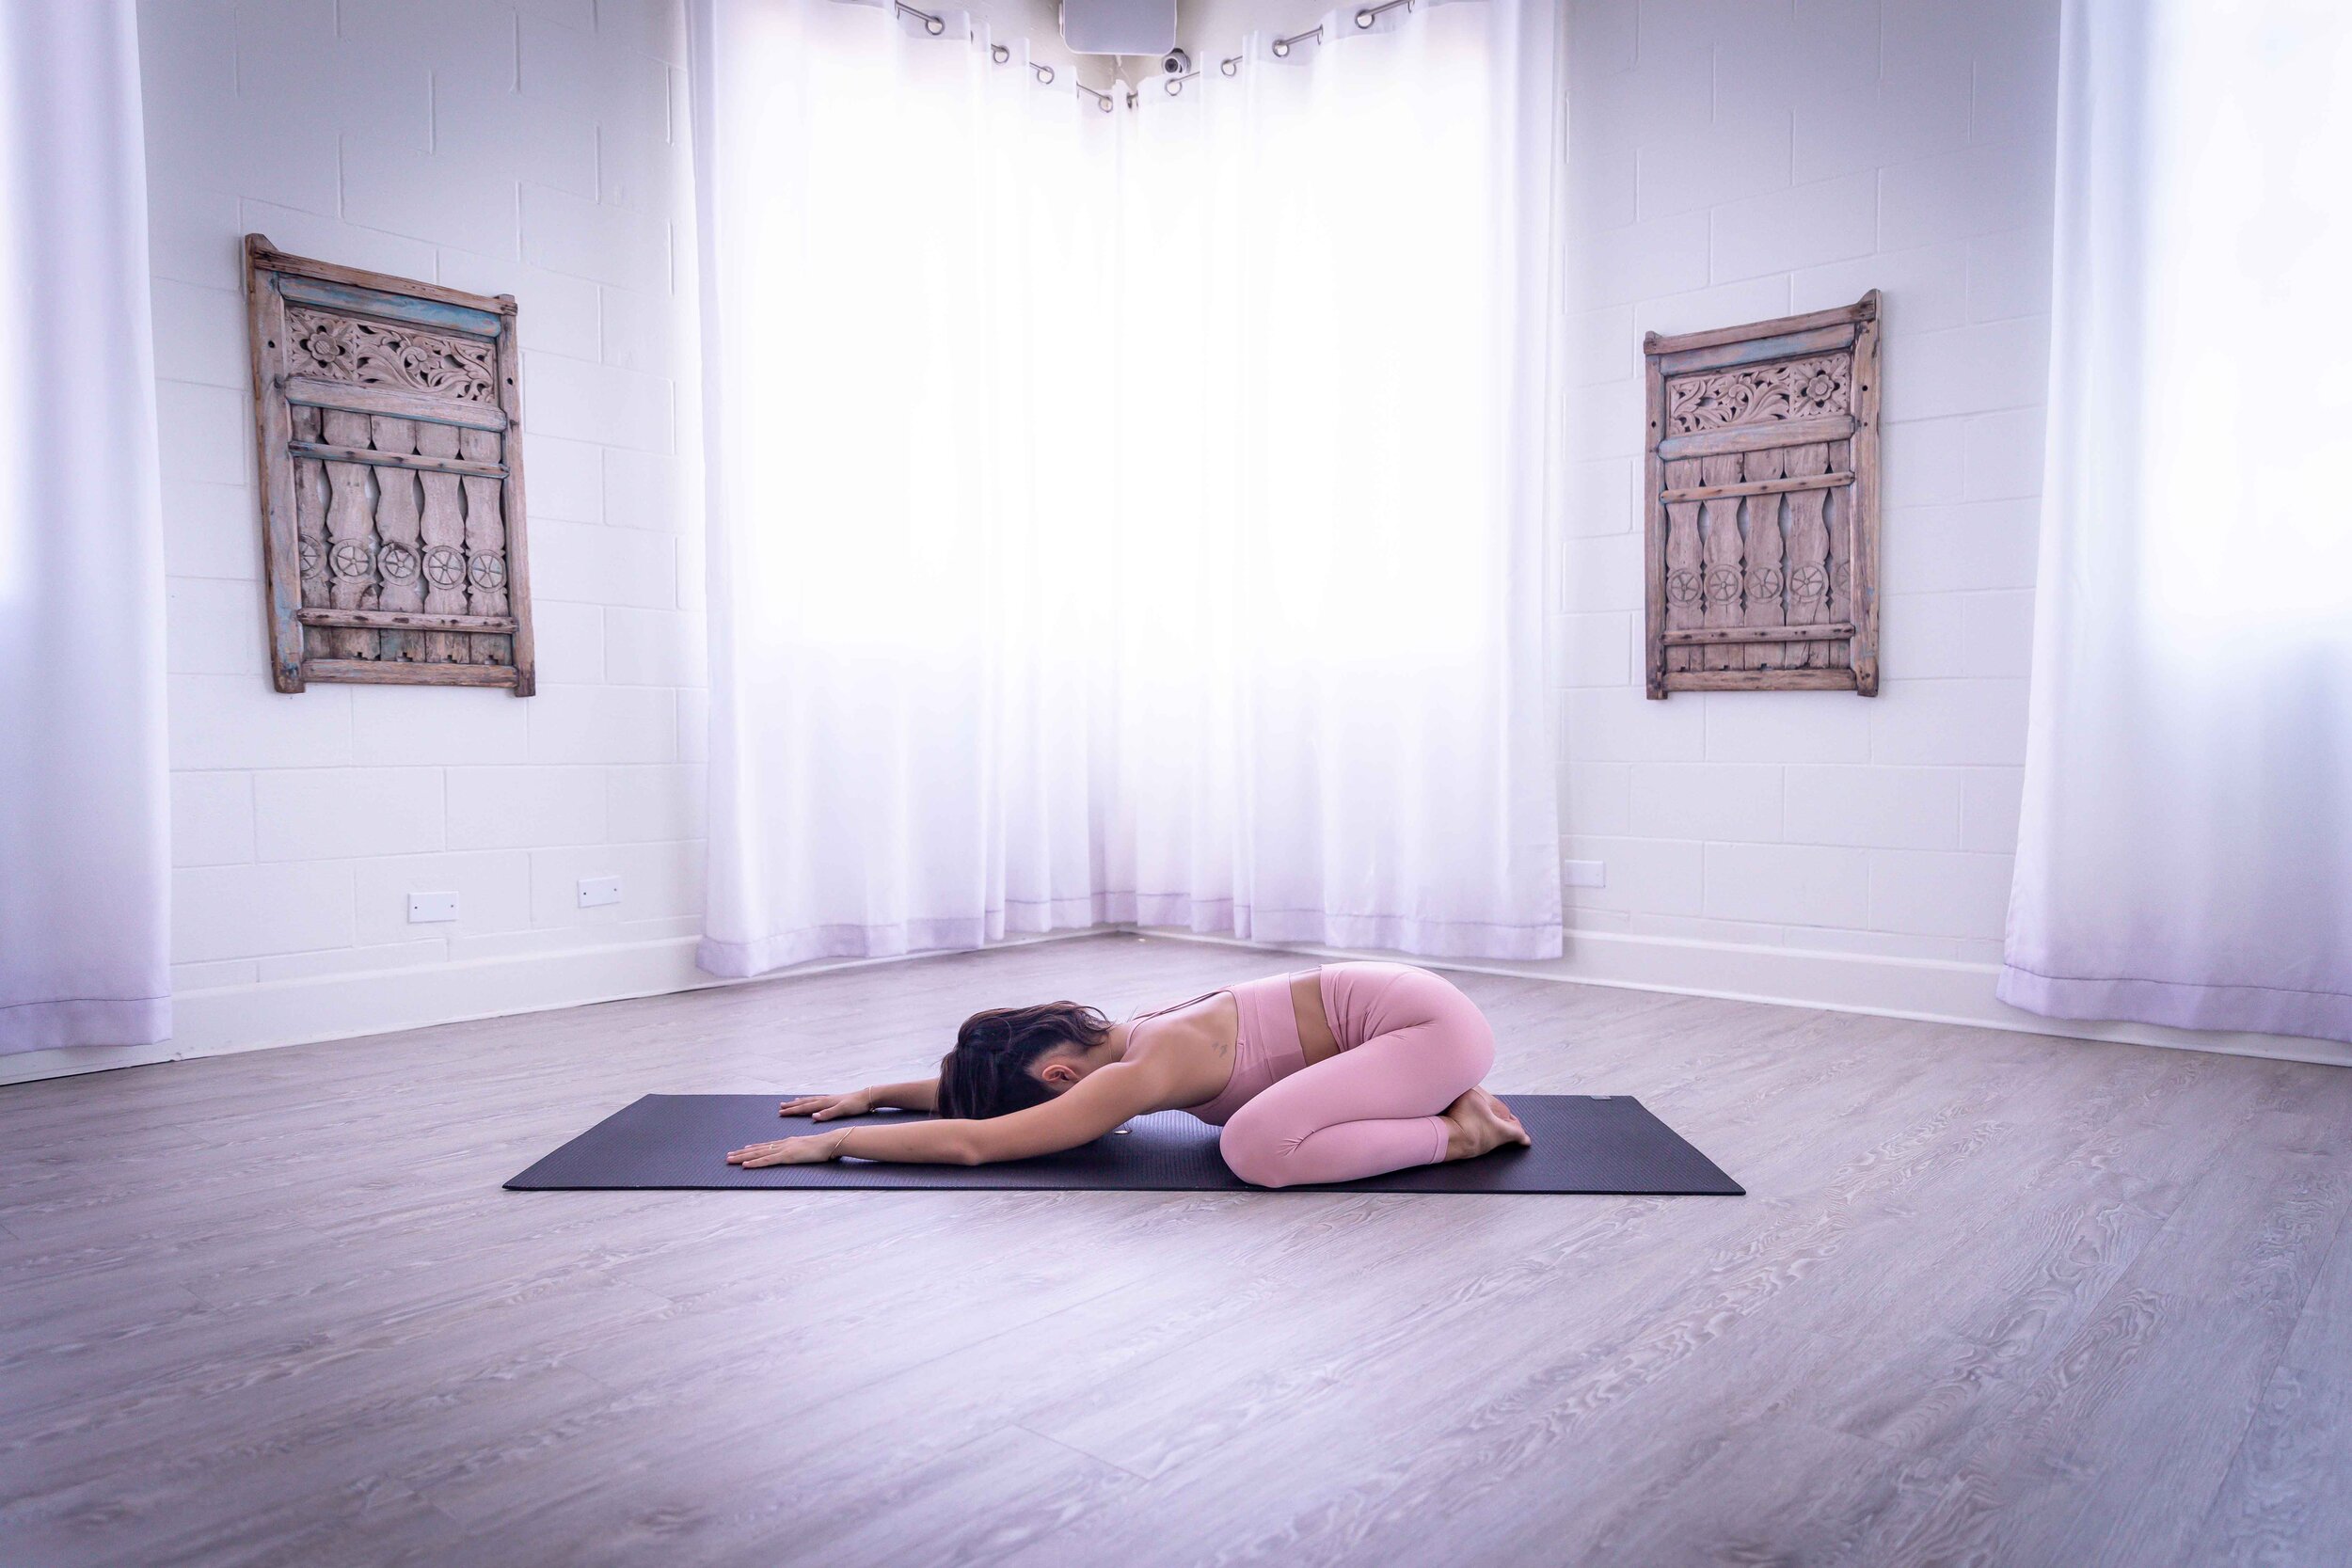
Child’s pose is a very relaxing pose, even though it’s an active spinal stretch. Try this pose before you go to bed every night to calm your mind, and your lower back will be prepped for a comfortable rest. It’s also a great place to finish off your daily yoga practice.
How to move into Child’s Pose:
Start in a tabletop position, then relax your hips to your heels. Relax your forehead to the floor. Hold for 5 to 10 full rounds of breath.
Tips for practicing Child’s Pose:
As you exhale, press into your palms and stretch your tailbone down to focus on strengthening your lower back. Remember, this is an active stretch!
If it’s more comfortable for you, you can open your knees and let your belly rest more comfortably towards the floor.
If your forehead doesn’t comfortably rest on the floor, place a blanket or yoga block under your forehead.
Seated Spinal Twist/ Half Lord of the Fishes Pose (Ardha Matsyendrasana)
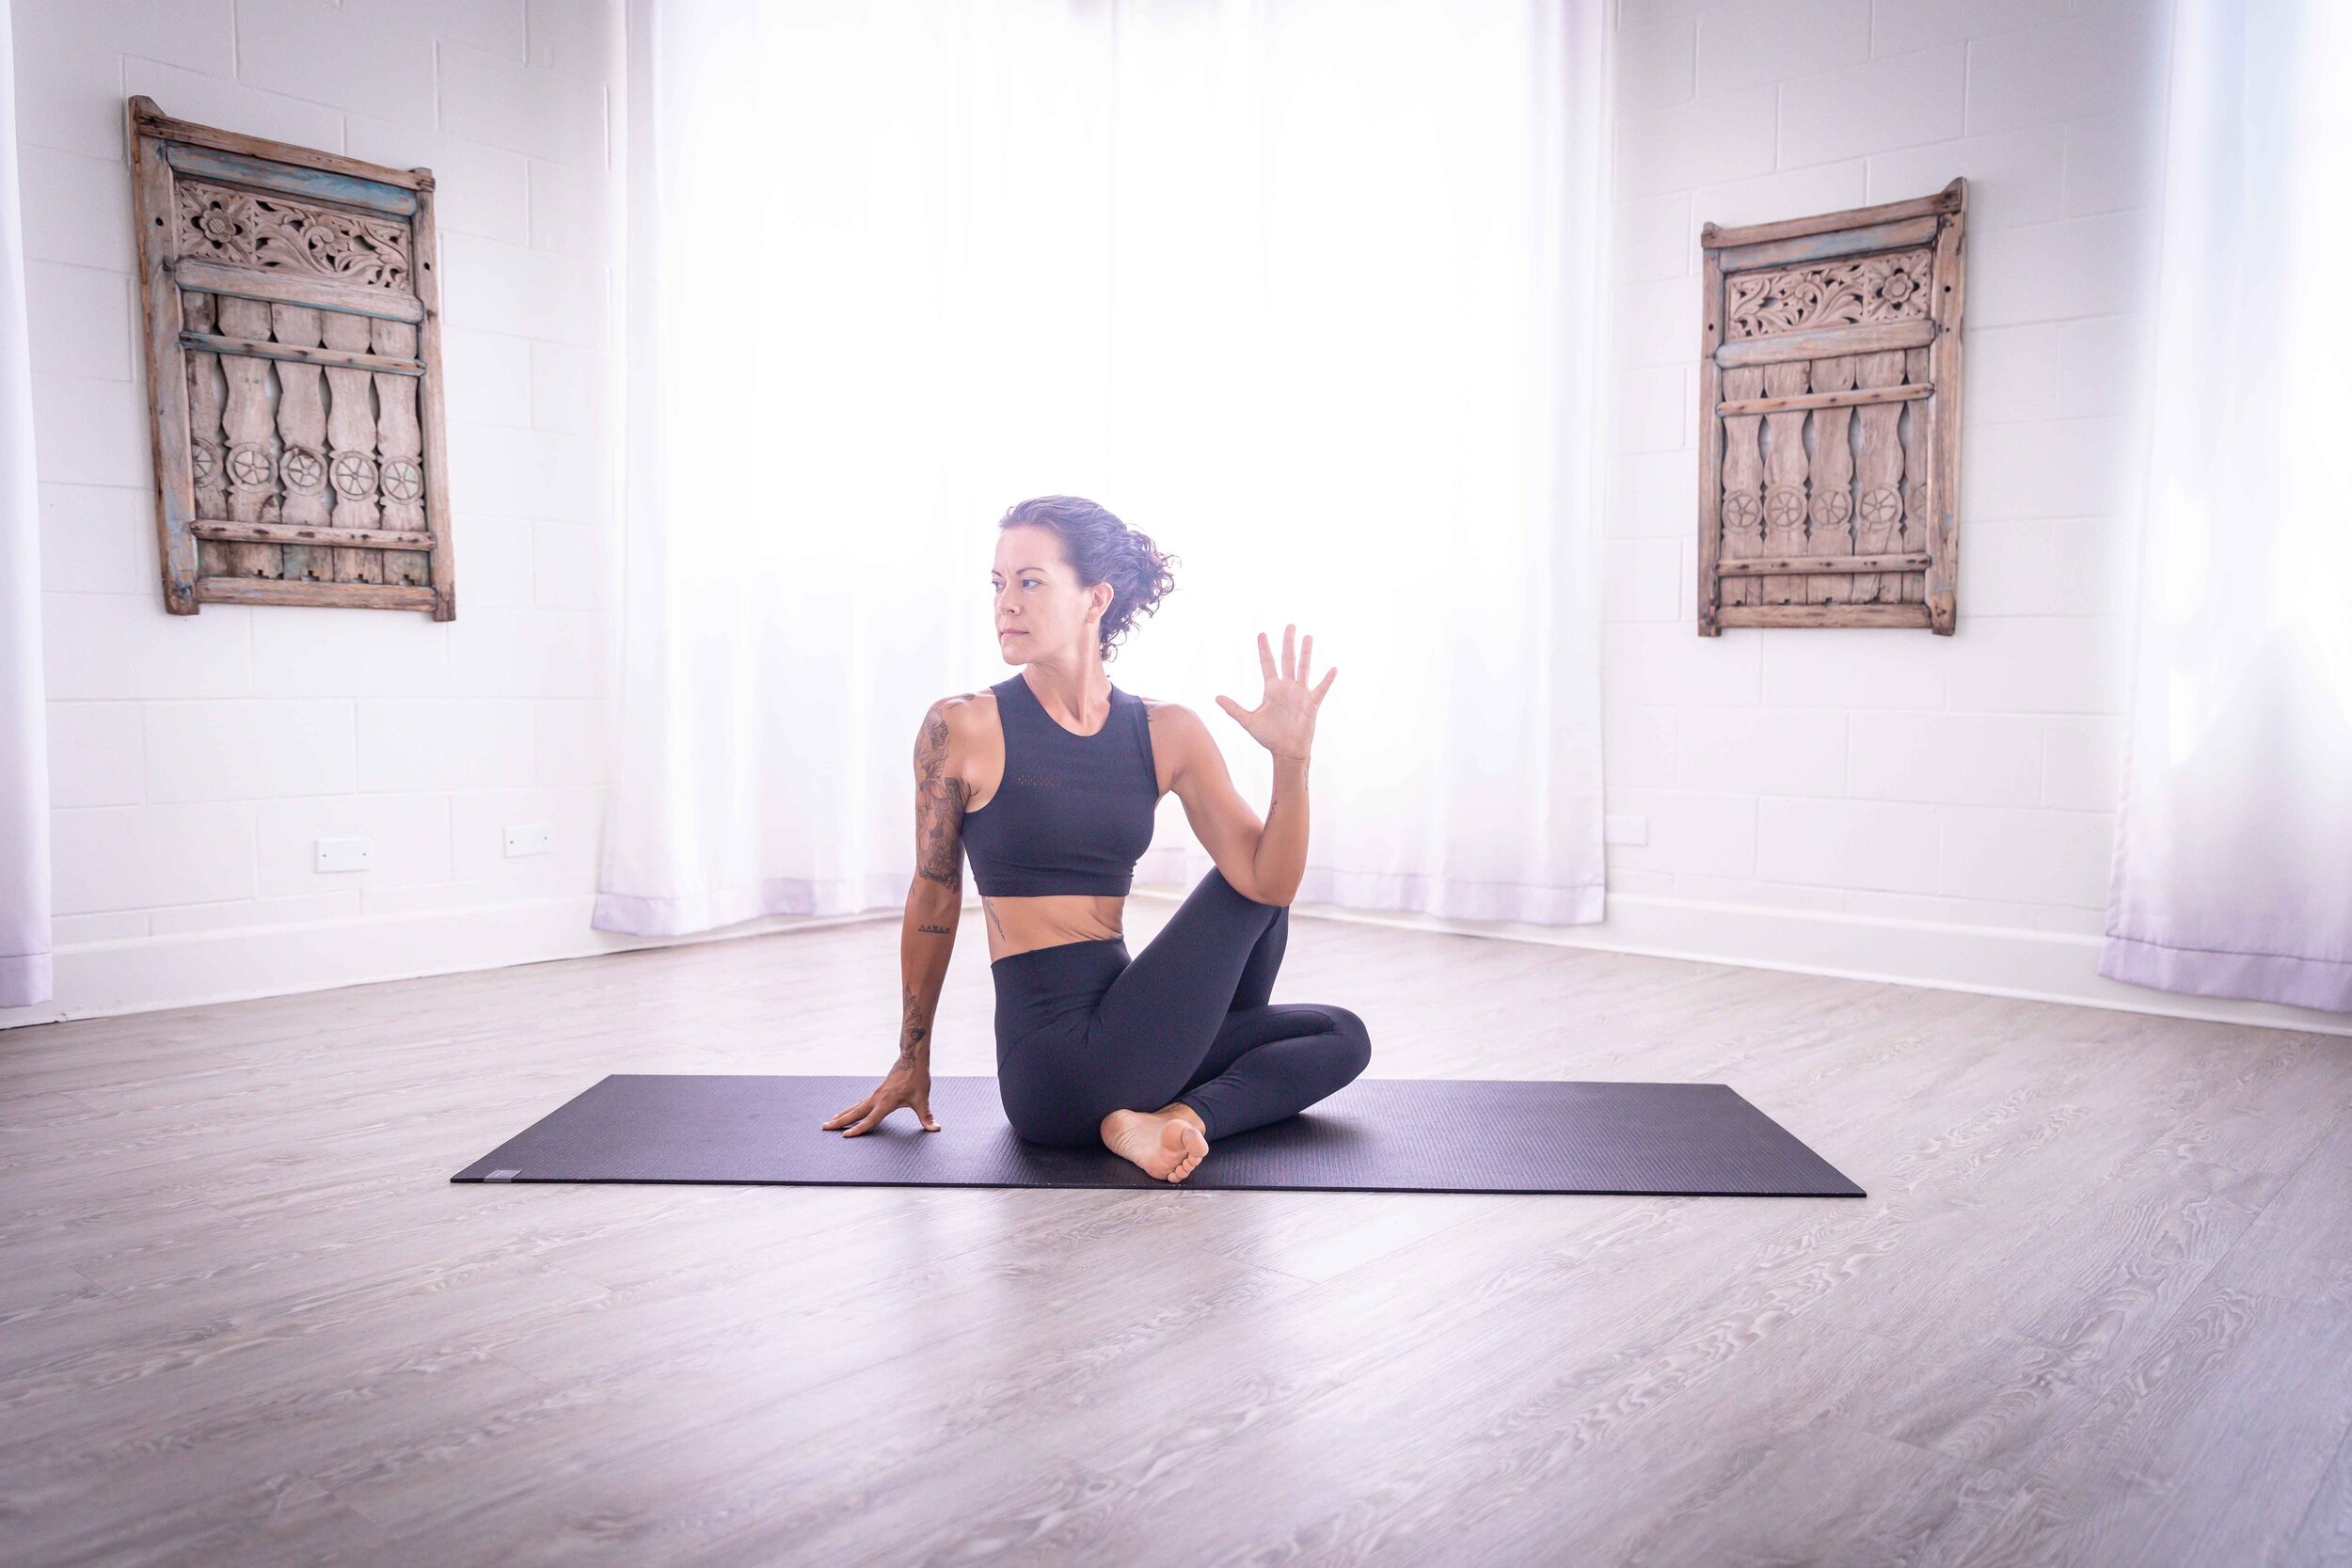
Twisting from your mid-back can activate the muscles around your lumbar spine to increase your overall core and low back stability, helping relieve low back pack. The important thing to remember here is to twist from your mid-back and torso rather than your low back and hips. Stability in your lower body will help you feel the benefits of increased blood flow and hydration to your low back and discs.
How to move into Spinal Twist:
Sit on the floor with your legs extended and your back straight. Bend your left knee and place your foot to the inside or outside of your right thigh, just your knee (placing it on the outside will give you a deeper stretch). Place your left knee on the floor behind you at the base of your spine. Place your right elbow to the outside of your left thigh. Activate your core and engage your abdominal lock. Lengthen your spine, and twist. Repeat for 5 breaths, then switch sides.
Tips for practicing Spinal Twist:
If you can’t comfortably reach your elbow to the outside of your knee, wrap your arm around your knee instead. You can slightly pull on your thigh to deepen your twist.
Lengthen your spine towards the ceiling the entire time you hold this pose.
Keep an equal balance in your left and right sit bones on the floor.
Supine Figure 4/ Supine Pigeon Pose
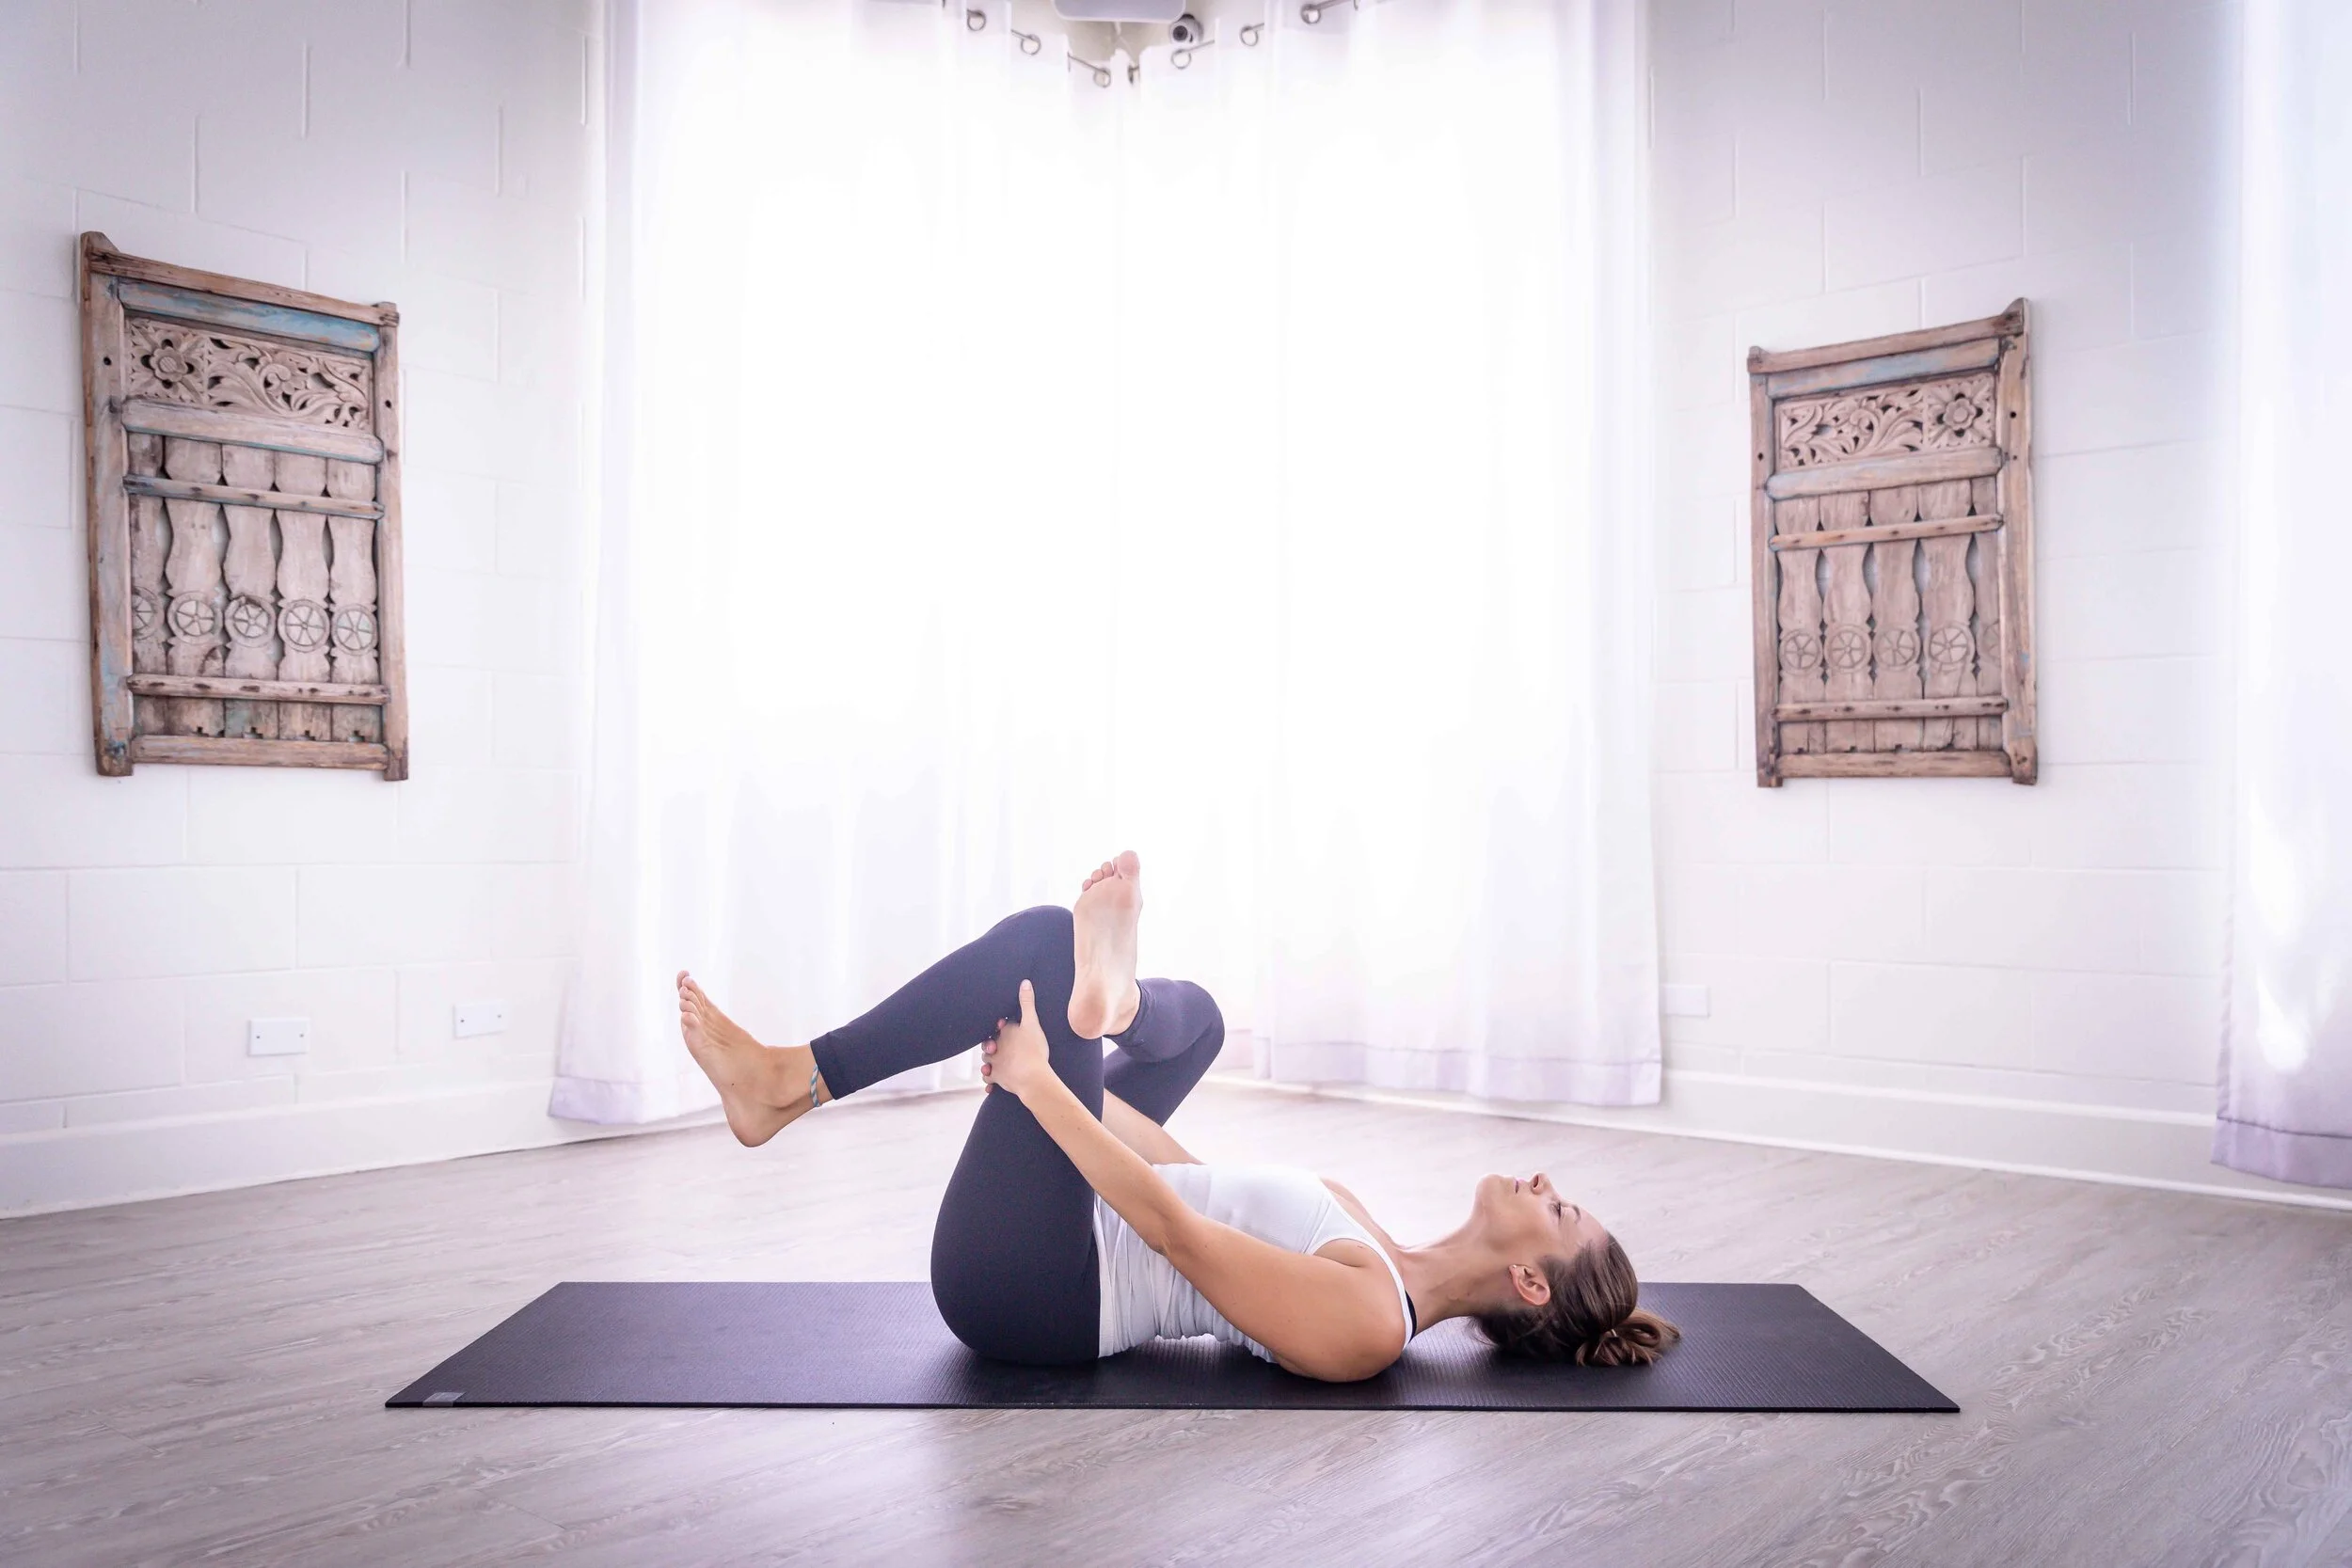
Remember how we mentioned tight hips can lead to low back pain? If you have tight hips, pigeon pose - and especially this gentle supine variation - should be a part of your daily routine. This hip, glute, and psoas stretch is an essential piece to the happy-lower-back puzzle.
How to move into Supine Pigeon Pose:
Lad down on your back with your knees bent and your feet planted at hips-width distance. Extend your right leg up, and then bring your ankle onto the top of your left thigh. Flex your right foot and allow your right knee to fall forward, away from your body, until you feel your hip stretch. For more depth, reach around for the back of your left thigh and draw both knees into your chest, keeping your lower back firmly planted. Hold for 5 to 10 round of breath, then switch sides.
Tips for best practice:
If your hips feel uneven, send your grounded foot slightly further away from your body
Keep your head and neck relaxed on the floor
Happy Baby (Ananda Balasana)

Happy Baby is an incredible stretch to connect to your sacrum and release tension in your lower back. It’s right in the name! The effects of a grounded happy baby can make your lower back feel relaxed and fully stretched out.
How to move into Happy Baby:
Lie flat on your back, then hug your knees to your chest. Grab onto the outside edges of your feet. Flex your feet. Press up through your heels while pulling down on your feet. Press your lower back down into the ground. Hold for 5 to 10 full rounds of breath.
Tips for best practice:
Focus on your lower back here. Feel your neutral sacrum pressing into the ground.
Keep this pose active with a balanced press and pull between your heel and hand.
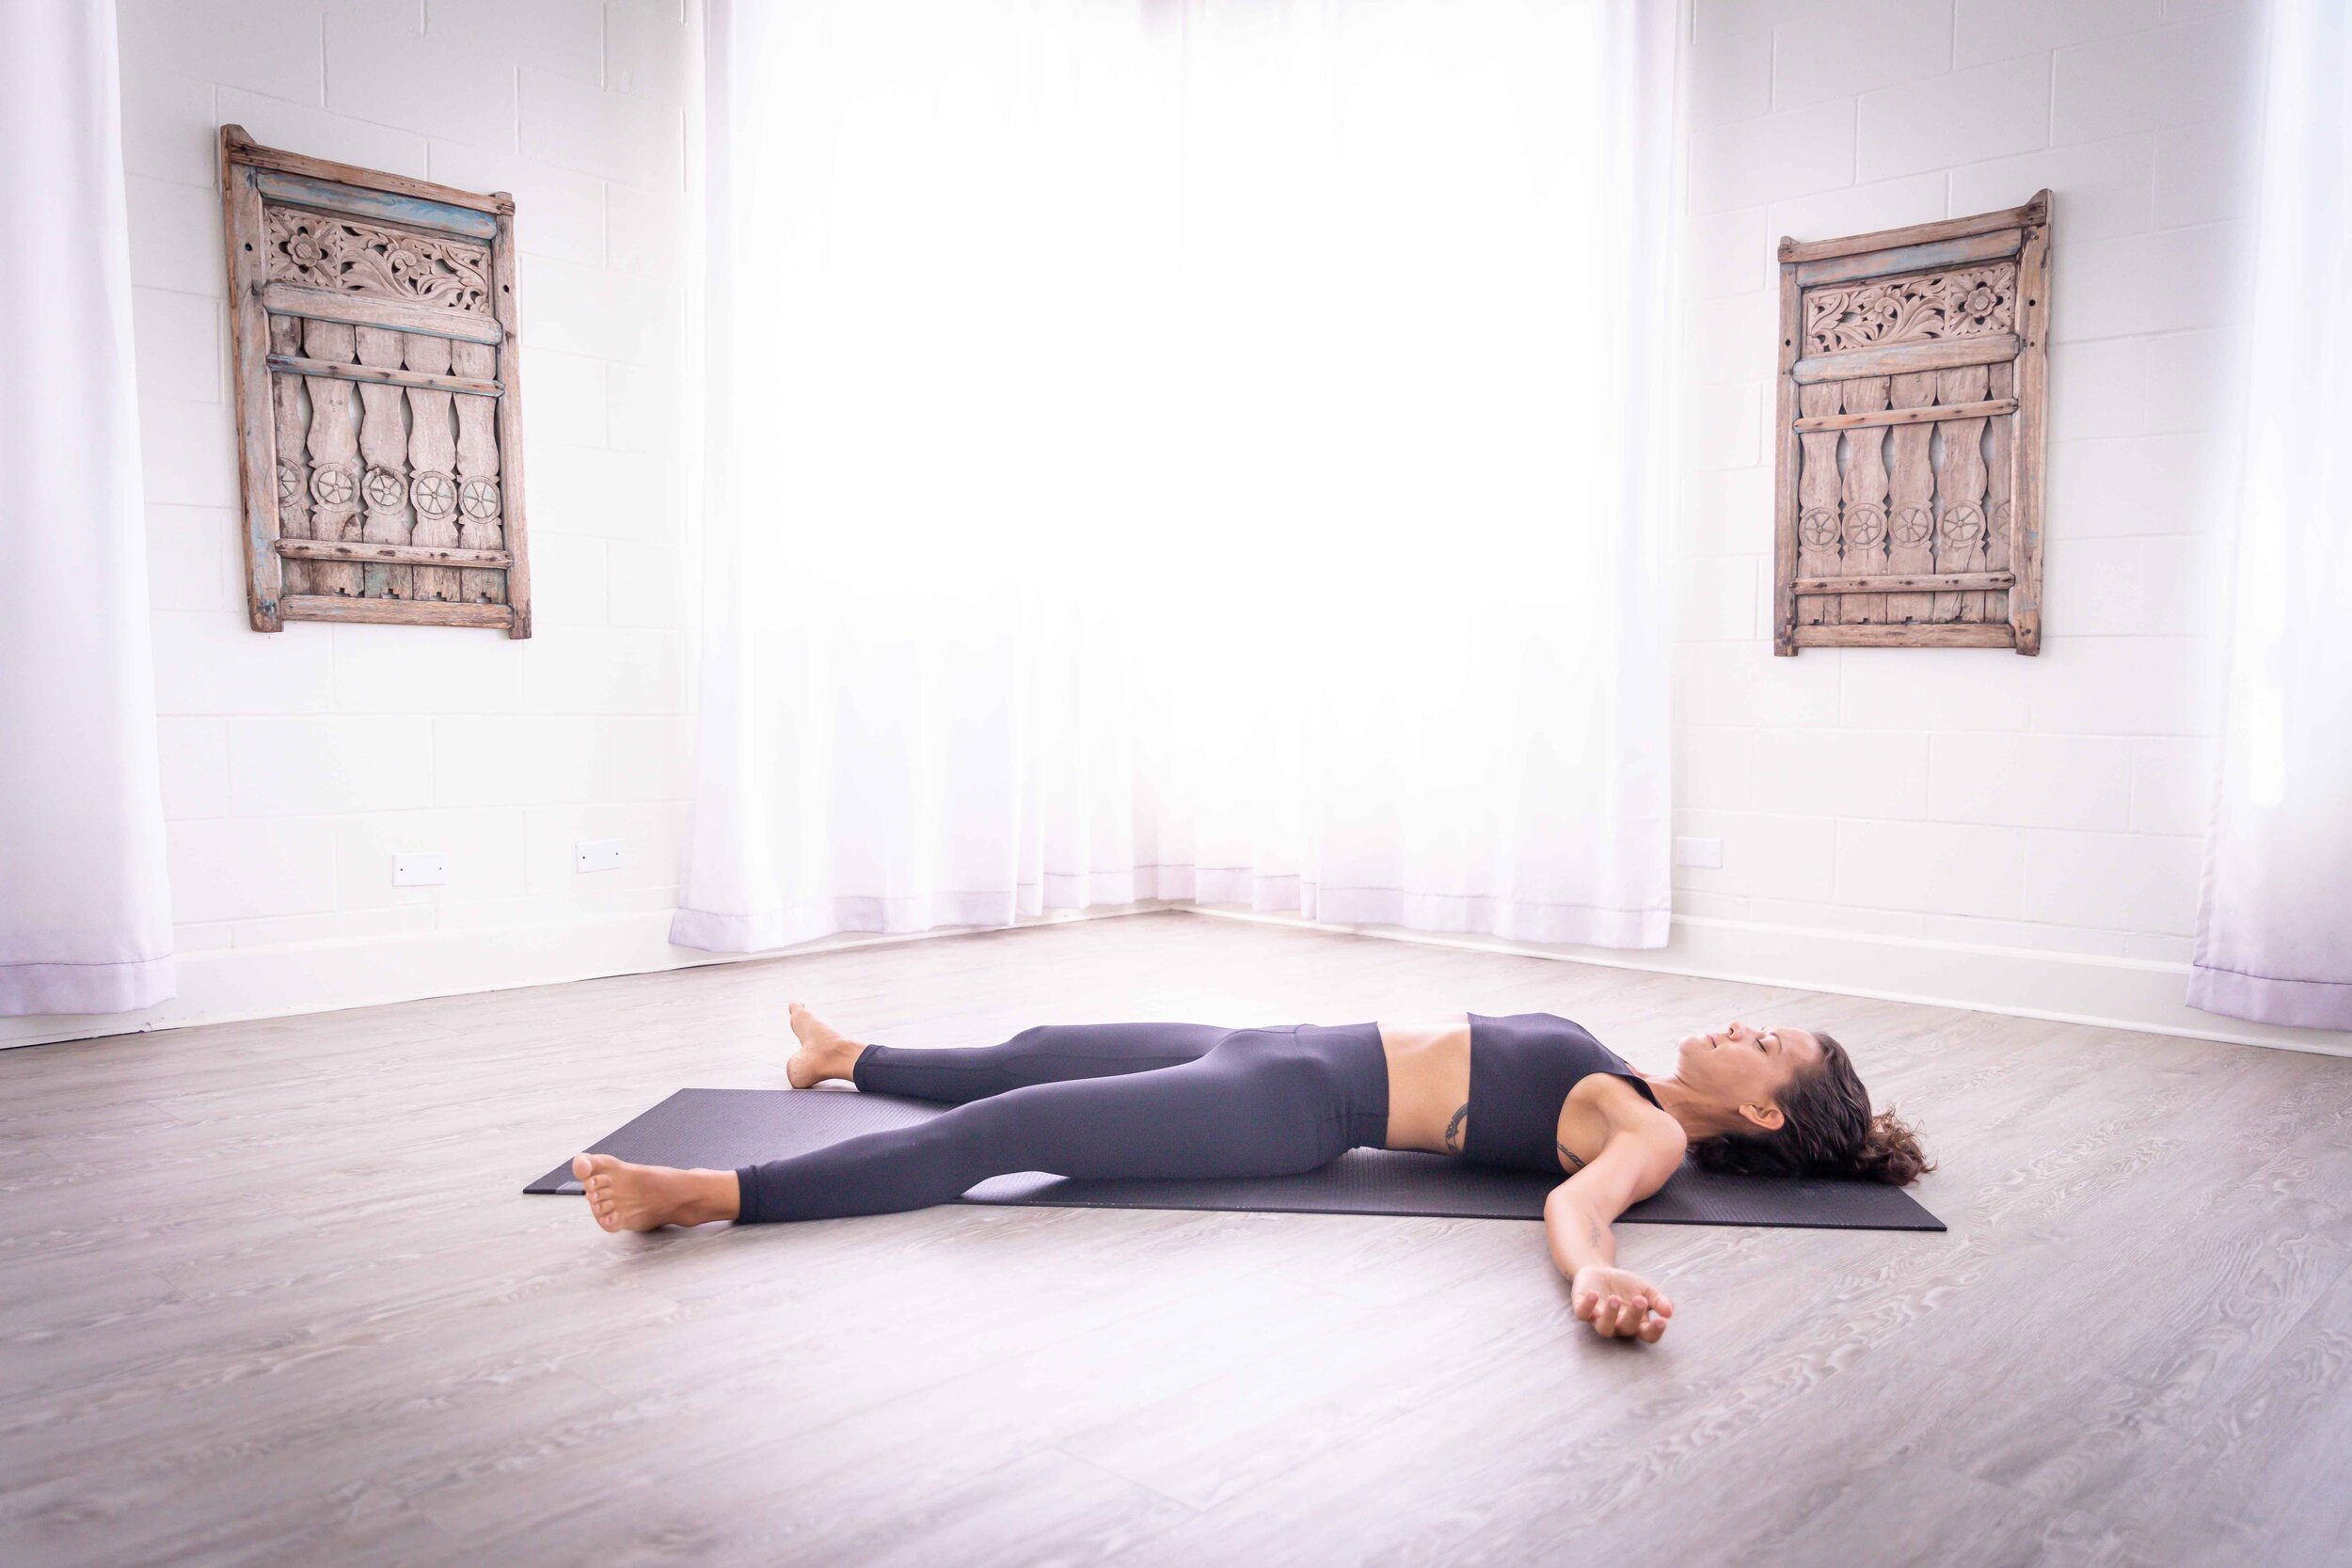
We love to follow this pose with 5 to 10 minutes of Savasana — lie on your back, bring your heels in line with your hips and let your toes fall out, close your eyes, and relax.
Start incorporating these 9 yoga poses for lower back pain into your daily routine, and soon enough the tight, aching pain will start to subside as you return to neutral alignment and a balanced body.
Which poses do you love for releasing lower back pain? Tell us in the comments below?